
The Komunist Manifesto: 8th Place US Nationals Report
Hi, I’m Gavin “kingofmars” “kingofkongs” “kok” “kom” “kokum” Michaels, and I have a rare medical condition that causes me to slap my head repeatedly. I also won US Nationals last year, and got top 8 in it this year which is kinda cool I guess.
Immediately after a Spring Regionals performance in which I lost to Randy Kwa in the top 16, I knew that sun, which I had been using for the entire year up till that point, would no longer be effective and that I had to adapt. I knew from the beginning that I wanted to build around strong non-mega Pokemon and then find the Mega Pokemon that best supported those Pokemon, as opposed to a Sun team build where Mega Charizard-Y dictates what else is used on the team. I decided that the best place to start would be with what I perceived to be the two best non-Mega Pokemon: Salamence and Rotom-Wash. Hydreigon was also on the original version of this team, but I replaced it. I’ve used Rotom-Wash throughout the VGC 2014 format and absolutely loved the bulky set, and Salamence’s ability to cover faster dragons while Hydreigon beat down everything else was super desirable. The next Pokemon that fit onto the team was one that I think has been super underrated this format: Mamoswine. Mamoswine’s typing and impossibly strong attacks made me want to at least try it out, and it worked superbly.
At this point in the teambuilding process I needed a Mega Pokemon, and after thinking about it for a while, I decided on Synthesis Mega Venusaur after being inspired by three losses to it at the Seattle Regional tournament. Mega Venusaur is interesting, since it performs well against all other Mega Pokemon besides the “big three” of the beginning of the format: Charizard-Y, Kangaskhan, and Mawile. I also enjoyed having a Mega Pokemon that wasn’t super frail and could actually take some hits. However, I also wanted a Mega Pokemon that was easily knocked out, so Mega Lucario became a natural fit on the team. Mega Lucario’s role was singular: beat Mega Kangaskhan and friends like Gardevoir. With such a simple purpose, one would think that I wouldn’t have used Mega Lucario a lot. This is VGC 2014 we’re talking about, though, and I saw a lot of Kangaskhan that did not enjoy eating Aura Spheres.
I tested Hydreigon in the May International Challenge, but it did not live up to expectations. I quickly began testing other Pokemon in Hydreigon’s spot. After testing Chandelure and finding it unimpressive, I finally listened to Zach Droegkamp’s suggestion to just use Choice Band Talonflame, and man did it work. Talonflame gave me excellent coverage against Pokemon my team was weak to, as well as giving me an excuse to finally use Giga Impact on a team. Once the team was made I went into phase two of my plan, which was to make sure that everyone possible knew my team in order to give me strength. This plan included using the team extensively on Pokemon Showdown and topping the ladder with it, freely discussing various aspects of my team, using it in heavily viewed showmatches, and of course giving people actual pastebins of my team.
The Team

DanceDance (Rotom-Wash) @ Sitrus Berry (brought 20/25 games)
Ability: Levitate
EVs: 252 HP / 72 Def / 164 SpD / 20 Spe
Calm Nature
– Hydro Pump
– Thunderbolt
– Will-O-Wisp
– Protect
In the beginning of the format when the rules were first announced, everyone thought that Rotom-Wash would be the best Pokemon in the format. Obviously that didn’t end up being the case, but Rotom-Wash is still good. Sitrus Berry is needed for a bulky Rotom, giving it more opportunity to stick around and be annoying. The EV Spread was actually the result of a miscalculation that I made back in December, but I ended up really enjoying having the extra Special Defense. This spread let me do cool things like survive a Solarbeam from Mega Charizard-Y, even with chip damage, and it even won me a game at US Nationals against the eventual winner Alex Ogloza, as my Rotom-Wash survived his Politoed’s Ice Beam with 1 HP remaining. The 20 Speed is designed entirely for Speed creeping purposes. I dumped the remaining EVs into Defense just because I didn’t see the point in investing in Special Attack. While this spread never OHKOs 4 HP Talonflame with Thunderbolt, being able to do so 100% of the time takes too many EVs for my liking. I decided that I would just use Hydro Pump to try to get the OHKO, though most of the time I could just Thunderbolt it anyway since shockingly enough, enemy Talonflame usually managed to damage themselves enough. The moves are as standard as it gets, with Protect being chosen over alternatives like Light Screen or Thunder Wave in order to preserve the one bulky Pokemon on this team. Nickname comes from my fifth generation nickname for Rotom-W, which is probably my all-time favorite sprite.

Bird (Talonflame) @ Choice Band (brought 16/25 games)
Ability: Gale Wings
EVs: 4 HP / 252 Atk / 252 Spe
Adamant Nature
– Brave Bird
– Flare Blitz
– U-turn
– Giga Impact
Talonflame is not a very good Pokemon if you judge it by its stats, specifically its Attack stat. In order for Talonflame to do appreciable damage, you’re going to need a boosting item of some kind. I ended up choosing Choice Band since not only does it allow Talonflame to score more important KOs, you also don’t have to worry about dealing 50% to yourself by attacking. Instead, you only do 40%! The first three moves shouldn’t surprise anyone. It’s a Choice Band Talonflame, what else am I going to run? The last move is actually pretty cool, as support options like Taunt, Will o Wisp, and Tailwind all had one major flaw: I was never going to actually use them. Those moves on a Choice Band Talonflame end up as complete filler, and never get used because you have to switch immediately after using them. Giga Impact actually provides for a rare win condition: when Talonflame is up against a lower health Rotom form. While my choice never came into play at Nationals, I won several games with it in practice. The nickname comes from the fact that Talonflame is a bird.

<3Blue Tears<3 (Salamence) @ Choice Scarf (brought 19/25 games)
Ability: Intimidate
EVs: 4 HP / 252 SpA / 252 Spe
Timid Nature
– Draco Meteor
– Dragon Pulse
– Fire Blast
– Rock Slide
If you’ve been paying attention to this format for any amount of time, you might notice that almost every good team has at least one Dragon type on it. When selecting my Dragon, I figured that I might as well go with the Dragon that beats every other Dragon: Choice Scarf Salamence. The main issue with running Scarf Salamence is running into the mirror and losing to a Speed tie. This is why I made sure to have plenty of other Pokemon that could beat opposing Salamence if need be. Draco Meteor is pretty obvious on Salamence. The other three moves took a large amount of debate for me to finalize. I’d been using Rock Slide for a while and found that I used it a lot more than Stone Edge, which was really only helpful against Mega Charizard-Y. I decided at the last minute to replace Stone Edge with Dragon Pulse, which worked beautifully in this tournament. Flamethrower was also changed at the last minute to Fire Blast to avoid missing the OHKO on Mega Lucario. I never actually ended up using my Fire move, though, so it didn’t end up mattering. The nickname comes from Simon being a massive weeb.

Venusaur @ Venusaurite (Brought 10/25 games)
Ability: Chlorophyll
EVs: 252 HP / 4 Def / 132 SpA / 4 SpD / 116 Spe
Modest Nature
– Leaf Storm
– Sludge Bomb
– Synthesis
– Protect
Despite what the usage stats might say, Venusaur was in fact my team’s primary Mega. I brought it in nearly every match where my opponent didn’t have a Kangaskhan, as Venusaur does absolutely fantastic against teams that lack it. The EVs are used to always survive an Intimidated Choice Band Talonflame Brave Bird. I wanted a good amount of bulk on my Venusaur, but I felt uncomfortable using an EV spread that essentially sacrificed all firepower in favor of just surviving attacks. Leaf Storm was my Grass type attack of choice over alternatives such as Energy Ball and Giga Drain, mainly because it actually gets some important OHKOs. Being able to OHKO Rotom-W is huge for my team, as residual damage from Will o Wisp is all sorts of awful. Sludge Bomb gets surprisingly good coverage and acts as a pretty decent neutral STAB attack. Synthesis was actually a really cool move in that if my opponent lacked ways to do significant damage to Venusaur, I could use Synthesis to stick around and be annoying for an even longer amount of time.

Lucario @ Lucarionite (Brought 15/25 games)
Ability: Inner Focus
Level: 50
EVs: 4 HP / 252 SpA / 252 Spe
Timid Nature
– Aura Sphere
– Flash Cannon
– Substitute
– Protect
Mega Lucario has literally only one purpose: to beat Mega Kangaskhan. In my opinion, every team that doesn’t use Kangaskhan needs one insanely hard answer to it. That doesn’t mean Intimidate or Aegislash. That means a Pokemon that goes out there and makes it impossible for Kangaskhan to do anything, like Jon Hu’s Sableye, Jeudy’s Wow Rocky Helmet Talonflame, or in my case Lucario. I originally tested a mixed set, but I was really disappointed with Flash Cannon. Eventually I got fed up and switched to a purely Special build, and I did not regret my decision at all. Substitute was actually inspired by Enosh’s Dirty Zoo team, which he gave out to one person at every Regional in order to try to get six Regional win (with exactly zero top cuts). Despite this, Substitute is a really good move on Mega Lucario, as it allows for an interesting win condition: instead of my opponent having to get rid of Mega Lucario, they now have to get rid of the Substitute, and then the Mega Lucario. While Mega Lucario did not quite perform on the level that Venusaur did, being used in all three of my losses in the tournament, it still did massive work against the wide variety of Kangaskhan that I played throughout the day.

Wisconsin (Mamoswine) @ Life Orb (Used 20/25 games)
Ability: Thick Fat
Level: 50
EVs: 4 HP / 252 Atk / 252 Spe
Adamant Nature
– Icicle Crash
– Ice Shard
– Earthquake
– Protect
The MVP of this team. Mamoswine can win games just by itself, dispatching the most common Pokemon in the format with ease. Mamoswine can even do massive amounts of damage to Pokemon that supposedly counter it, such as Gyarados. I chose Life Orb as my item, as it lets Mamoswine get important OHKOs on Pokemon like Salamence, Garchomp, Amoonguss, Tyranitar, and Mawile, all of which are very relevant in this format. I chose Icicle Crash over Icicle Spear because I actually like knowing how much damage I’m going to do, instead of just sitting and hoping I get whatever’s enough. Ice Shard allows me to dispatch low health Pokemon or Pokemon with a 4x weakness to Ice very easily. Earthquake is an amazing secondary STAB, and with Mamoswine being one of two viable Ground type Pokemon in this format, having access to that strong Earthquake is invaluable. The most interesting part about this Pokemon is probably its nickname, which was given to it in honor of Zach’s impressive string of Regional runs with his own Mamoswine, including winning an event with a unev’d one. I thought it was just an homage, then this happened:
[2:43:15 AM] Gavin Michaels: WHAT JUST HAPPENED
[2:43:17 AM] Gavin Michaels: WHY DO I HAVE
[2:43:19 AM] Gavin Michaels: 252 HP MAMOSWINE
[2:43:22 AM] Zach: AHAHAH
[2:43:23 AM] Gavin Michaels: WITH ZERO ATTACK EVS
[2:43:25 AM] Zach: YOU NAMED IT WISCONSIN
[2:43:27 AM] Zach: THIS IS SO FITTING
[2:43:42 AM] Gavin Michaels: HOW DOES THIS ALWAYS HAPPEN
[2:43:45 AM] Gavin Michaels: I won so many games
[2:43:47 AM] Gavin Michaels: with a
[2:43:51 AM] Gavin Michaels: 0 attack mamoswine
So with that prophecy being fulfilled, I went off to Nationals with my 19-year-old Father, a small white girl, and an Asian weaboo. I knew that in order to do well at Nationals, I would need a good night’s sleep, so I went to bed relatively early for a Pokemon event. Of course, then came the fire alarms. For those of you not aware, from 2:30-3:30 AM, the Hyatt’s fire alarm was going off for no reason, preventing anyone staying there from getting any sleep. Still better than the train hotel. In any case, I ended up waking up at 3:30 AM and armed with a cup of coffee and 3 hours of sleep, I was ready to try to defend my title.
Nationals: Day 1
Round 1 vs Bye
Since I made top 16 in Championship Points, I was eligible to receive a Round One bye at Nationals. While other authors might make a joke about how they barely won their bye round or whatever, I’ve actually lost to a bye before, so I’m going to keep whatever remaining karma I have left and move on.
Round 2 vs Michael Stetler [3-6]
Fortunately for me I did not know my first opponent. I saw from his shirt he was part of the Penn State Pokemon Society. I have decent familiarity with the group after beating their former President, Alex Valente, in the top eight at last year’s US Nationals.


He’s pretty clearly bringing the Kangaskhan here, so Lucario is in. With the potential double Dragon lead and the ability to get off Intimidate, Salamence becomes another obvious choice. In case my Salamence goes down, however, I need to bring Mamoswine in back. Finally, since Talonflame is doing literally nothing against this team, I choose Rotom-W as my last Pokemon.
T1: Lucario/Salamence vs Rotom-Wash/Tyranitar
To be honest, this is one of the best lead matchups I could have hoped for. I know that unless that Tyranitar is Scarfed, which doesn’t make sense considering he has Salamence on his team, he’s going to be Protecting it this turn. Meanwhile, his Rotom-W might choose to do a passive action such as Will-o-Wisp my Lucario, and the worst he could do is attack it, meaning that there’s no real negative consequence to going for the Substitute. He ends up doing exactly what I hoped for, as I set up a Substitute and do a good chunk of damage to his Rotom with Dragon Pulse.
T2: Lucario/Salamence vs Rotom-Wash/Tyranitar
I know there’s a very real chance of him not wanting to keep his Tyranitar in. However, if he doesn’t have Gengar in back, then he lacks good switch-in options. In addition, it could be very possible that after the first turn he could YOLO mode it and attack, which would be awful for me if it pans out. As a result, I’m forced to Aura Sphere his Tyranitar. Dragon Pulsing the Rotom is still a no brainer. Unfortunately for me, he does end up switching his Tyranitar into Gengar to avoid the Aura Sphere, while his Rotom-W gets knocked down into the range where one more Dragon Pulse will finish it off and he breaks my substitute with Hydro Pump, breaking his own presumed Focus Sash on Gengar with Sand damage.
T3: Lucario/Salamence vs Rotom-Wash/Gengar
To be completely honest, I had no idea how much damage Flash Cannon will do to Gengar. I was confident I would be able to win even if Flash Cannon didn’t pick up the KO, so I go for the Flash Cannon onto Gengar and the Dragon Pulse onto his Rotom-Wash. His Rotom-Wash gets knocked out easily enough, but Flash Cannon barely fails to KO Gengar. Lucario takes a Shadow Ball for enough damage to make Kangaskhan a legitimate threat to knock it out, and Gengar faints to Sand damage.
T4: Lucario/Salamence vs Kangaskhan/Tyranitar
At this point, I know that all I need to do to get into a comfortable position to win is to take out his Kangaskhan, so there’s no real reason for me to go for any other move besides Protecting Lucario. He does end up going for the Fake Out onto my Lucario, as Dragon Pulse does a respectable amount to his Kangaskhan and Salamence faints to a combination of Rock Slide and Sand damage.
T5: Lucario/Mamoswine vs Kangaskhan/Tyranitar
With him revealing Fake Out on Kangaskhan, I’m pretty sure that he lacks Protect. I set myself up so I can KO his Kangaskhan regardless of move choice, and I Earthquake and Aura Sphere the Kangaskhan. He ends up Sucker Punching my Lucario for the knock out, but my Earthquake leads to his Kangaskhan and Tyranitar both surviving with extremely low amounts of health, as my Mamoswine takes almost half from Life orb + Rock Slide, and the sandstorm finishes.
T6/7/8: Mamoswine/Rotom-Wash vs Kangaskhan/Tyranitar
On the off chance that he still manages to somehow have Protect on his Kangaskhan, I double Protect. I then proceed to Earthquake and Thunderbolt his Kangaskhan as my Mamoswine gets knocked out from a Sucker Punch and my Rotom is able to finish off his Kangaskhan. Tyranitar doesn’t do nearly enough to knock out my Rotom as I finish it off with a Thunderbolt next turn for a 1-0 win.
Despite the close score, I felt that I was in control of the match for the entire time and eagerly awaited to see who I would be playing next.
Round 3 vs Kevin Fisher (Uncle Taint) [5-4]
I recognize the name from last year’s top cut, but don’t feel too bad about the pairing since there were games like Wolfe vs Paul and Benji vs Collin happening all around me.

Well, look at that. A Mega Lucario mirror. I really can’t justify using Mega Venusaur here, so I’m going to have to end up bringing Lucario. I really want to lead Salamence for his Lucario, and to avoid uncomfortable spots involving his Salamence/Tyranitar I’m going to have to lead Mamoswine too. Rotom-W is really not doing much here besides beating Talonflame so I’m going to have to go with my own.
T1: Salamence/Mamoswine vs Rotom-Wash/Talonflame
This is probably the worst lead matchup I could have asked for, but it should be fine as long as I preserve my Salamence. I doubt he’ll go for an aggressive action with Talonflame here since that’s just asking for a quick exit via Rock Slide, and Mamoswine isn’t doing much at all so I’ll just Protect and Dragon Pulse the Rotom-W. Not surprisingly, his Talonflame Protects, while my Mamoswine Protects and Dragon Pulse hits his Rotom-W for around 30%, meaning that he’s using a good amount of special bulk. Rotom goes for the…. Hidden Power. Ah crap. Salamence does end up surviving with 31 HP thanks to the Hidden Power nerf, but that is not a good way to start off a game.
T2: Salamence/Mamoswine vs Rotom-Wash/Talonflame
At this point he has two options he can go for with Talonflame: Brave Birding my Salamence, or switching out to something that deals with whatever he expects me to switch out for. I decide that Mamoswine really isn’t going to be too useful this game considering his leads and what’s almost certainly Lucario in back, so I end up going for the Icicle Crash onto his Talonflame, knowing that I either KO his switch in to Salamence or his Talonflame after recoil. I need to get Salamence out of here ASAP, however, so I’m going to have to switch into my own Talonflame, hoping that he just goes for the HP Ice on it. He ends up switching his Talonflame into Salamence as I knock it out with Icicle Crash. His Rotom-Wash gets revenge on my Mamoswine, knocking it out with a Hydro Pump.
T3: Talonflame/Lucario vs Talonflame/Rotom-W
This is a really crappy spot I managed to get myself into, as I’m pretty much forced to sacrifice my Salamence and get the Speed boost from Mega Evolving. He ends up Flare Blitzing my Lucario and Thunderbolting my Salamence, meaning that I’m down 2-3.
T4: Talonflame/Lucario vs Talonflame/Rotom-W
I know that his Talonflame isn’t going to be able to knock out mine, so he’s probably forced to Thunderbolt my Talonflame. My options for Lucario are hoping that an Aura Sphere will be able to KO his Rotom-Wash. I decide to end up hoping for the Aura Sphere KO, as even if it fails I still have a solid shot to win. My Talonflame OHKOs his, as Aura Sphere is not enough for the KO. Rotom eats its Sitrus Berry, and I see the Thunderbolt on my…. Lucario? I’ll take it! Apparently he expected me to set up a Substitute after watching my game on stream vs Yoshi where I favored Substitute heavily, so I managed to get a win from showing people my team somehow.
T5: Talonflame/Lucario vs Rotom-W/Lucario
I keep it simple and Brave Bird his Lucario and Aura Sphere his Rotom-Wash as I end up with the 2-0 win.
Round 4 vs Thomas Mifflin (PBB) (5-4)
This round is what I like to refer to as “The round of death”, mainly because I’m surrounded by people I know playing people I know, and then people I don’t exclusively playing people I don’t. Looking through standings, there were 24 games this round where I had both people playing on facebook. Unfortunately for me, I ended up playing someone I knew pretty well too in Tom.


I finally get a game where I can bring Venusaur, nice! Salamence’s Intimidate is going to be vital to winning this, along with Burn support from Rotom-Wash, while Mamoswine does great damage to most of his team. For the first time this tournament, Team Preview is actually super simple for me.
T1: Venusaur/Salamence vs Zapdos/Kangaskhan
His Zapdos is almost certainly going for the Hidden Power Ice onto my Salamence here, so I need to switch that out into Rotom-Wash. The worst thing his Kangaskhan can do to my Venusaur this turn is a -1 Fake Out, so I feel pretty comfortable not Protecting and instead firing off a Sludge Bomb. He ends up double targeting my Rotom-Wash with Fake Out and Hidden Power for very minimal damage, and my Venusaur is able to do almost half to his Kangaskhan with Sludge Bomb.
T2: Venusuar/Rotom-Wash vs Zapdos/Kangaskhan
I really don’t see much of a reason to go for any other play besides WoW on Kangaskhan and Sludge Bomb on Zapdos, as even if he switches, nothing is going to appreciate the damage. He does end up switching into his Salamence, which takes the Will-o-Wisp, while Zapdos’ Thunderbolt does sizable damage to Rotom-Wash. Venusaur’s Sludge Bomb does a bit under half to Zapdos and ends up Poisoning it, which is going to be great for my damage potential later on.
T3: Venusaur/Rotom-Wash vs Zapdos/Salamence
At this point, with Kangaskhan at half health, me having Intimidate support, and Rotom being at low enough health, I decide that I really don’t care whether Rotom is knocked out at this point. I decide to Thunderbolt his Zapdos to finish it off while Protecting Venusaur to avoid the potential Specs Draco Meteor. The Draco is aimed squarely at Rotom-Wash, who skillfully dodges it and Thunderbolts the Roosted Zapdos for almost no damage.
T4: Venusaur/Rotom-Wash vs Zapdos/Salamence
With him aiming Draco at Rotom-Wash, I’m pretty comfortable thinking that his Salamence is not using Specs. I decide to double target it, as Zapdos is doing pretty much nothing. His Salamence ends up Draco Meteoring my Venusaur, who also skillfully dodges it. Hidden Power does almost nothing to Venusaur, and Sludge Bomb and Thunderbolt takes out his Salamence.
T5: Venusaur/Rotom-Wash vs Zapdos/Kangaskhan
At this point, I really don’t have much of a reason to not double target his Kangaskhan with Leaf Storm and WoW, as he either gets burnt or knocked out unless I get a low damage roll. He ends up double targeting Rotom-Wash with Power-Up Punch and Thunderbolt, knocking it out, while Leaf Storm barely misses the KO on his Kangaskhan.
T6: Venusaur/Salamence vs Kangaskhan/Zapdos
With his unwillingness to switch out Zapdos, I’m fairly comfortable thinking that he has Azumarill in back. However, I still need to Dragon Pulse his Kangaskhan and switch out Venusaur to reset the -2 drop, knowing that even if he does switch out into Azumarill, he’d be giving up a +1 boost. He ends up double attacking my Salamence with Sucker Punch and HP Ice, but not before I can knock out his Kangaskhan with a Dragon Pulse. With me having Venusaur vs his Zapdos and Azumarill, I win pretty easily at this point 2-0.
Round 5 vs Katie Baker (6-3)
I pull someone at 4-0 who I don’t recognize, and they turn out to be another Penn State Pokemon Society member.


This very much so feels like a Rain team with the wrong weather Pokemon. Unfortunately for me, neither of my Megas are going to be able to put in too much work here, with Lucario being slightly favored in order to beat his Scizor and OHKO her Tyranitar. Talonflame and Mamoswine do very well against her entire team, but I want to avoid leading Mamoswine to avoid Intimidate. For Garchomp, I’ll put Salamence as my last Pokemon, though it’s a tough decision between it and Rotom-Wash.
T1: Lucario/Talonflame vs Manectric/Ludicolo
This is not a good spot for either of my Pokemon to be in and I really strongly regret bringing Lucario. However, I’m pretty sure that if I can take out her Manectric I should be able to win. To keep myself safe, I’m going to just switch Talonflame into Mamoswine and protect Lucario. Judging from the Mega Evolution order with my Lucario going first, she’s using a Modest nature on her Manectric. Mamoswine takes a Fake Out while Protect blocks Flamethrower.
T2: Mamoswine/Lucario vs Manectric/Ludicolo
Luckily for me, she really lacks any good switch ins for Earthquake, and if I can get Talonflame in along with Salamence I should be able to get myself into a good position even if she Protects. Crossing my fingers, I Earthquake and switch Lucario into Talonflame, which takes a Flamethrower. Mamoswine is able to OHKO her Manectric before fainting to Ludicolo’s Giga Drain.
T3: Lucario/Talonflame vs Ludicolo/Tyranitar
At this point I realized that I win no matter what she does, and am able to clean up very easily to win 2-0.
Round 6 vs Andy Himes (Amarillo) [9-0, 3-3]
Andy actually was the one who first taught me VGC when I was still a Senior on PO in 2011, so this was going to be an interesting game. Right before the game he said that he really did not want to play me, since he hadn’t taken a game off of me since at least 2012, but it looks like he jinxed himself.


Lucario should be able to take care of his three Fighting weak Pokemon, and Rotom-Wash will be able to do work against his Rotom-Heat and Aegislash. Salamence can be switched out of easily enough assuming it’s Timid Scarf. In back Salamence and Mamoswine seem pretty solid for whatever else he can bring, with priority taking care of his Smeargle’s Focus Sash and Salamence’s ability to outspeed in general being extremely nice.
T1: Lucario/Rotom-Wash vs Salamence/Scrafty
It’s pretty likely from my point of view that he’s going to fake out Rotom-Wash and go for the Fire Blast on Lucario to try to pick up the KO, so in order to keep momentum I decide to switch Rotom-Wash into Mamoswine while I Protect Lucario. Unfortunately for me however, he Fakes Out and Dracos the Rotom-Wash slot, which KOs the Mamoswine switch in. Judging by the damage I can rule out Timid Scarf, and he didn’t take any recoil so I’m going to assume that he’s running Specs.
T2: Lucario/Rotom-Wash vs Scrafty/Salamence
Knowing that his Salamence has Choice Specs, I’m pretty confident here that he’ll go for a double switch, probably into Aegislash for his Scrafty and Salamence into Kangaskhan, so in preparation I’m going to set up a Substitute with Lucario and Will-o-Wisp his Salamence or potential switch in. Long story short, he doesn’t switch, and reveals that his Salamence is actually not Choice locked after all. Instead, he double targets my Lucario with Flamethrower and Drain Punch, easily knocking it out.
T3: Salamence/Rotom-Wash vs Salamence/Scrafty
Despite how bad this looks, if he didn’t bring Aegislash I should still have a chance at winning this. I just need to knock out his Salamence and Will-o-Wisp the Scrafty and I should be okay. That is if it didn’t turn out that he was Modest max Special Attack Haban Salamence, ruining everything. I run as I end up losing my first match of the tournament 1-3.
Round 7 vs Nathan Rollins (TruthWalker) [6-3]
After losing my first game, I realize that I need to win some games if I want to make cut: two out of the last three, to be exact. I would really prefer to avoid the nerves that come with being 6-2, so I need to win out so I can blow off my last round.


Here we have a “Protect the Kangaskhan” team. Luckily for me I have my Lucario, which will certainly be helpful. With him having Rotom-Heat and Azumarill I know I also need to bring Rotom-Wash. Despite the Bisharp, Salamence could potentially be really helpful in getting Intimidate off onto Kangaskhan or dealing with his Rotom-H, and considering that Talonflame does close to nothing here, Mamoswine is chosen as the last Pokemon.
T1: Lucario/Rotom-Wash vs Rotom-Heat/Kangaskhan
Against a lead like this I am more than comfortable to just double Protect and see what he does, as he reveals that he’s using a Jolly max Speed Kangaskhan by Mega Evolving before my Lucario, as he Fakes Out Rotom-Wash and Overheats into my Lucario’s Protect.
T2: Lucario/Rotom-Wash vs Rotom-Heat/Kangaskhan
With the threat of Will-o-Wisp and Aura Sphere facing his Kangaskhan, I’m pretty confident that he’ll end up switching. I decide that Hydro Pumping his Rotom-H and switching Lucario to Salamence would be the best play. Unfortunately for me, he stays in with Kangaskhan and Power-Up Punches my Lucario while Overheating Salamence for about 40% HP. Hydro Pump lands squarely onto Rotom, which does around 90%, and according to my notes there’s no Sitrus activation.
T3: Salamence/Rotom-Wash vs Rotom-Heat/Kangaskhan
The Return onto Rotom-Wash is seeming pretty obvious, so I need to Protect. That Rotom-Heat is most likely switching out, so Dragon Pulsing the Kangaskhan is going to be my best play here. He does end up doing exactly that, switching Rotom into Azumarill, as my Dragon Pulse crits for about 60% HP.
T4: Salamence/Rotom-Wash vs Kangaskhan/Azumarill
At this point he needs to Sucker Punch my Salamence, so I’m free to not Protect with Rotom-Wash and instead Thunderbolt his Azumarill to prevent him from going for the Belly Drum. He does end up Sucker Punching my Salamence, KOing it, but my Thunderbolt does surprisingly low damage to his Azumarill. I’m led to believe he’s running Assault Vest, as my Rotom-Wash actually avoids his Play Rough.
T5: Lucario/Rotom-W vs Kangaskhan/Azumarill
With Thunderbolt not being able to KO, Will-o-Wisping the Azumarill is going to be my best option, and I can’t afford his Kangaskhan to go wild if I Substitute with Lucario, so I just go for the simple Aura Sphere on Kangaskhan. He switches Azumarill out for Rotom and sacrifices his Kangaskhan.
T6: Lucario/Rotom-Wash vs Rotom-Heat/Azumarill
Rotom-Wash is much more valuable than my Lucario at this point, so I’m pretty comfortable thinking that he won’t double attack my Lucario. This means that I can get a Substitute up without too much of a problem. With how likely his Rotom is to Protect here, Thunderbolting his Azumarill has to be my play. He does end up Protecting, with Thunderbolt bringing his Azumarill’s HP just barely into the red, as Play Rough breaks my Substitute.
T7: Lucario/Rotom-Wash vs Rotom-Heat/Azumarill
At this point I have no reason not to double attack, so I do so and knock both of his Pokemon out. He reveals his last Pokemon to be Bisharp, and I win easily, 1-0.
Round 8 vs Collin Heier (TheBattleRoom) [6-3]
I just need to win one of my next two games to make it to the next round. I prepare myself mentally to play FIFTH IN CP Collin knowing that if I can just win this game I’m one step away from getting my Worlds invite.


So the two members of Team USA who used their actual Nationals teams against Germany are doing the best, that’s kind of awesome. I’m pretty sure that he’ll lead his Rotom-Wash here to stop my possible Mamoswine/Talonflame lead, so I opt to lead Venusaur to counter that, while also leading Talonflame in order to threaten his entire Trick Room option. Mamoswine is needed in back for the damage it can do to most of his team, and Rotom-Wash’s bulk should work out here.
T1: Venusaur/Talonflame vs Reuniclus/Hydreigon
At this point I just want to do damage to his Reuniclus and not make it incredibly easy for his Mawile to switch in, so I opt to double target Reuniclus. I forget that his Hydreigon is Choice Scarfed, but my Talonflame skillfully dodges Hydreigon’s attack and gets off a ton of damage onto his Reuniclus. The combination of that and Venusaur’s Sludge Bomb leaves Reuniclus poisoned with about 30% HP remaining as it sets up Trick Room.
T2: Venusaur/Mamoswine vs Reuniclus/Hydreigon
Well that was lucky. I’m pretty sure that he won’t switch into Mawile here since if I Earthquake that’s gg, so I opt to Icicle Crash his Hydreigon and switch Venusaur into Rotom-Wash to avoid huge damage from Psychic. I’m right about him staying in, as he Hidden Powers my Rotom, doing a whopping 9 HP of damage, while Icicle Crash easily KOs his Hydreigon.
T3: Rotom-Wash/Mamoswine vs Reuniclus/Mawile
At this point with victory looking like an inevitability, I’m a little paranoid of what he can do to stop it. I’m not sure if he’s using Recover on Reuniclus or not, but I don’t want to risk it and end up going for the Ice Shard on Reuniclus and WoW on Mawile. He ends up going for the Helping Hand Play Rough onto Rotom-Wash as I Ice Shard a Pokemon that would have fainted to Poison anyway.
T4: Venusaur/Mamoswine vs Mawile/Rotom-Wash
So my move last turn was really dumb. Really, really dumb. I still am in a winning spot, though. I just need to stall out Trick Room for my Talonflame, so double Protect time. He uses Iron Head on my Mamoswine and Will-o-Wisp on my Venusaur.
T5: Venusaur/Mamoswine vs Mawile/Rotom-Wash
Now I just need to Leaf Storm and let my Mamoswine faint and I should win. This is exactly what I do, with my Venusaur surviving the Iron Head with 61 HP left.
T6: Venusaur/Talonflame vs Mawile
Both of us know that his only way to win is if he gets a critical hit, and he doesn’t. I’m able to win my seventh game and ensure myself a spot in day two of Nationals.
Round 9 vs Ray Rizzo (Ray) (5th Place)
Frankly, I’m elated that I made it to day two, and honestly don’t care about what happens to me. That is until I get Ray as my last opponent, at which point I want to see how well I can do for a pride point of view. Even if this game doesn’t count for anything, it’s going to be intense.

I can tell from just looking at Team Preview that Talonflame is going to be my key to winning this game, as it’ll match up excellently along with my Mamoswine, Salamence and Venusaur. I’m pretty confident of my choices in Team Preview and start the battle.
T1: Mamoswine/Salamence vs Hydreigon/Mawile
Getting the Intimidate off on Mamoswine is not ideal, but I still have a high chance of netting myself the KO so I’m not worried. I Ice Shard my Salamence for the OHKO as Ray Fire Blasts his Mawile but misses. However, his Play Rough connects onto his Hydreigon, easily OHKOing it. Did I mention that we were both trying to lose? Because that’s kind of important here.
T2: Mamoswine/Talonflame vs Mawile/Ludicolo
I’m not too worried about the Fake Out here, since either way I’ll do some quality damage onto my own Pokemon. He decides to just not bother, as I Brave Bird my Mamoswine, netting another KO, while Ray attacks his own Pokemon for 60% each, revealing the Sitrus Berry on Ludicolo.
T3: Talonflame/Venusaur vs Mawile/Ludicolo
At this point I‘m pretty sure I can lose on recoil from my Talonflame, so I Brave Bird my Venusaur, OHKOing it as he misses another attack aimed at his Mawile. He does manage to get the Play Rough KO on his Ludicolo.
T4: Talonflame vs Aegislash/Mawile
I’m a little paranoid about Brave Birding into his Aegislash, since an Attack drop from King’s Shield means I’m doing a lot less recoil to myself. I opt to attack his Mawile instead. Ray predicts this, though, and Protects his Mawile while attacking it with Flash Cannon to bring his Aegislash into Blade forme. I see the opportunity for more recoil damage and Brave Bird his Aegislash before he can Sucker Punch it, leaving my Talonflame at 1 HP. We both know that the game is going to come down to whether I can pull off a critical hit on his Mawile or not, and luckily for me I don’t and lose the game 0-1.
So after making the second day of US Nationals, I just need to finish the day with a 3-3 record and I make Worlds. Top 8 should net me a paid trip to Worlds, too, but I was not too sure about that.
Nationals – Day 2
Round 1 vs Mario Serrano (Mario C) [1-5]
Luckily I don’t know my opponent very well, which means I once again avoid getting paired up with a friend early on.


Outside of Talonflame, this is actually a really good matchup for Lucario. I just needed to dispatch the Amoonguss which he’s likely to bring, as well as deal with possible Kangaskhan/Gardevoir leads. Him leading Talonflame or Aerodactyl would make things annoying, but as long as I have Rotom-Wash in the back I should be able to switch in on it just fine. Mamoswine can pick up the KOs on 3/6 mons so I decide to keep it in the back.
Game 1 vs Marrio S.
T1: Talonflame/Lucario vs Gardevoir/Kangaskhan
Hello perfect lead matchup! I see literally no reason to go for a play besides the Aura Sphere onto Kangaskhan and Brave Bird onto Gardevoir, which should KO both. He ends up protecting Kangaskhan and surviving the Brave Bird as his Gardevoir goes for… Trick Room. Not going to lie I did NOT see that one coming.
T2: Talonflame/Lucario vs Gardevoir/Kangaskhan
If he has Trick Room, that means he almost certainly has Hammer Arm on his Kangaskhan, which means bad things for my Lucario. If I protect Lucario as he wastes a Hammer Arm attacking it, Brave Bird is an easy 2HKO on his Kangaskhan, and if I get rid of that I should win, so I stick with that as a turn. He actually reveals that he has Ally Switch, as my Brave Bird ends up accidently KOing his Gardevoir, while he reveals Power Up Punch onto my protected Lucario.
T3: Talonflame/Kangaskhan vs Talonflame/Lucario
Man this guy is full of surprises, in any case Lucario is not in a good spot right now. Regardless of whether he gets off a Power Up Punch or not, if I can take out his Talonflame and have Lucario outside of Trick Room vs his Kangaskhan, I should be able to win. To preserve Lucario I switch into Rotom-Wash and Brave Bird his Talonflame. For some reason he ends up protecting with Kangaskhan here, which confused me. My Talonflame strikes first with Brave Bird, as it lives with a decent amount of health in the red, meaning it’s a bulky Talonflame. My Rotom eats a Flare Blitz which actually does a pretty respectable 60 hp, respectable enough so that it faints to recoil.
T4: Talonflame/Rotom-W vs Kangaskhan/Amoonguss
The gameplan is: get Talonflame/Lucario vs this outside of Trick Room.. A big part of making sure that that happens is having Talonflame alive, so to avoid it eating a Sucker Punch it gets switched out to Mamoswine. For Rotom-Wash, I imagine he’ll end up Sporing it, and if it’s sleeping I lose a lot of insurance with Mamoswine, so Protect ensures that I have more options the next turn. He ends up Protecting his Amoonguss for some reason as he Sucker Punches where Talonflame was.
T5: Mamoswine/Rotom-W vs Kangaskhan/Amoonguss
If I Icicle Crash Amoonguss here and Will-O-Wisp Kangaskhan, I can’t think of a way for him to exploit it, so I do just that. He Spores Rotom and Power Up Punches my Mamoswine, which survives and Icicle Crashes Amoonguss for the OHKO, as Trick Room ends. From here Lucario is able to come in and win 3-0
Game 2 vs Mario S.
With me leading Talonflame last game, I doubt he’ll lead Amoonguss. I think there’s a very good chance of him leading Aerodactyl or Talonflame this time, so I’m leading Rotom-W> Talonflame and keeping everything else the same.
T1: Rotom-Wash/Lucario vs Aerodactyl/Talonflame
Man I’m glad I lead Rotom, no real reason to do anything aggressive with Lucario here, since he’ll probably just Flare Blitz Lucario. I just need to Hydro Pump Talonflame and I’m in a really good spot. He Tailwinds with Aerodactyl and switches Talonflame to Amoonguss, revealing the Black Sludge
T2: Rotom-Wash/Lucario vs Aerodactyl/Amoonguss
I can use this time to set up a Substitute with Lucario, since neither of his Pokemon can really touch me. If I get a Will-O-Wisp off on his Aerodactyl, it will do even less damage which makes it useless, and breaks the Sash anyways. If he Rage Powders instead of Sporing, which he’ll probably do, Will-O-Wisp will do a lot more damage over time to his Amoonguss, so I opt for Substitute and Will-O-Wisp. He ends up not Rage Powdering, as Rock Slide hits both and crits Rotom-Wash for around a third of its health, Lucario subs but Rotom is flinched, as Spore lands on Lucario’s sub.
T3: Rotom-Wash/Lucario vs Aerodactyl/Amoonguss
Not an awful turn for me. At this point it’s more important for me to just pick up damage on both of his Pokemon, so the Thunderbolt onto Aerodactyl and Flash Cannon onto his Amoonguss makes a lot of sense, as Mamoswine will be able to finish either off with Ice Shard. He ends up going for the Rock Slide and Crits both of my Pokemon, still not knocking out Lucario’s sub though. Thunderbolt does around 90% to his Aerodactyl, while Amoonguss is able to pick up the Giga Drain KO on Rotom-Wash.
T4: Lucario/Mamoswine vs Aerodactyl/Amoonguss
At this point he should be fearing the Icicle Crash onto his Amoonguss, so it’s likely he’ll take a passive action with it. However, if Mamoswine flinches here I probably lose, to avoid that I’m going to just Ice Shard the Aerodactyl and Flash Cannon the Amoonguss, expecting him to either Rage Powder or Protect it. He does neither however as Aerodactyl switches into Talonflame, with Ice Shard doing around 40% to his bird and Flash Cannon leaving his Amoonguss in red, which he follows up with a Spore onto Mamoswine.
T5: Lucario/Mamoswine vs Talonflame/Amoonguss
To be completely honest, I have no idea at this point what this guy will go for anymore, but I do know that based on Ice Shard’s damage, Flash Cannon might be enough to pick up the KO on his Talonflame here, especially after recoil. I know that he can double target my Lucario here, but it doesn’t really make much sense considering how easy it is for me to just target his Amoonguss, so I expect the double target onto my Mamoswine and Flash Cannon his Talonflame. He Brave Birds my Mamoswine as I survive with 17 hp, he doesn’t have life orb, as flash cannon KOs his Talonflame, and Giga Drain finally breaks my substitute.
T6: Mamoswine/Lucario vs Amoonguss/Kangaskhan
I know that he’s probably going to take this opportunity to go for the Power Up Punch, but if he goes for it on Lucario I get knocked down to low enough HP where Sucker Punch and Rock Slide should finish me off, which is not a spot I want to deal with. However, if he Power Up Punches my Mamoswine, I get a free switch into my Talonflame to put myself into an ideal spot, so I Protect Lucario and fire off a hopeful Earthquake with Mamoswine. He Rage Powders and Power Up Punches my Lucario, leading to a dead turn.
T7: Mamoswine/Lucario vs Amoonguss/Kangaskhan
I’m pretty sure he’ll go for the same turn here, so I need to switch out Lucario to avoid fainting to a follow up Sucker Punch here and hope that I can wake up and Earthquake the Amoonguss for the KO. He ends up Sucker Punching my Lucario for some reason and also spores my Lucario spot, now a Talonflame.
T8: Mamoswine/Talonflame vs Amoonguss/Kangaskhan
I know that now at least that my Mamoswine will wake up, and I really need to Ice Shard his Amoonguss and take it out in case he wants to Power Up Punch my Mamoswine. My Talonflame sleeps as I finally wake up and KO his Amoonguss, fainting to recoil, as his Kangaskhan Power Up Punches my Talonflame.
T9: Lucario/Talonflame vs Kangaskhan/Aerodactyl
I know that he’s going to go for the Rock Slide and Sucker Punch here, and after the stroke of bad luck I’ve been having, my only shot at winning this is if I either get an avoid or if my Talonflame gets the one turn sleep. Luckily for me I end up with the one turn sleep and KO his Aerodactyl, as my Lucario survives the Sucker Punch with around 8 HP and I win with Aura Sphere. Win 2-0
That last game was a lot closer than I would have liked it to be, but I’m just 2 wins away from making it to Worlds for the third year in a row, and I know I can do it.
Round 2 vs Jason Ihekoma (Hona) [2-4]
Once again, I pull someone I don’t know in this round, so this keeps me on my toes going into team preview.

Game 1 vs Jason I.
So despite the Drapion, pretty standard Mega Venusaur team. I have no idea what Drapion does and honestly wasn’t even entirely sure on the type. I’m confident it doesn’t get cool support moves so I’m not too worried about it. For the Mega Venusaur mirror I know that I’m going to have a massive advantage thanks to Talonflame, which he should realise. That means he’s pretty likely to lead with Rotom-H, so a nice neutral lead of Venusaur/Salamence should work great against whatever he decides to bring, with Rotom and Talonflame in back, the former for Azumarill and Rotom-H, and the latter for his Venusaur. I know that in a war of bulk, I’m going to win almost every time, so I’m pretty comfortable with this matchup.
T1: Venusaur/Salamence vs Azumarill/Meowstic
So this is a lead that’s going to be hard for me to mess up too badly, I just need to Leaf Storm his Azumarill and Dragon Pulse his Meowstic and I should be alright. He ends up Protecting to no one’s surprise and sets up a Light Screen, but my Salamence really does not care, as I do 70% to Meowstic with a fortunate critical hit.
T2: Salamence/Venusaur vs Azumarill/Meowstic
Since I know he can survive any attack Venusaur can throw out it, I need to get my Salamence out of there in favour for my Rotom-Wash. He switches out his Azumarill into his Rotom, as Psyshock on Venusaur does 40% and Sludge Bomb onto Rotom-H does around 30%
T3: Venusaur/Rotom-Wash vs Meowstic/Rotom-Heat
I really do not want to have to eat a combination of Overheat and Psyshock, so I’m just going to protect Venusaur here and Thunderbolt his Meowstic to hopefully finish it off. Apparently his Rotom is scared of mine and flees into his Venusaur, as his Meowstic sets up a Safeguard, possibly fearing my Sleep Powder, and Thunderbolt leaves his Meowstic at a very low sliver of health.
T4: Venusaur/Rotom-Wash vs Meowstic/Venusaur
While now seems like a great time to bring in Talonflame, it’s just too likely that he’ll go for the Sleep powder or the Sludge Bomb considering that I already revealed Salamence, so I decide it’s not worth it until I can bring it in for free. With his Meowstic he’s almost certainly Psyshocking here, so if I Synthesis I can pretty much waste the turn. I switch Rotom into Salamence, as his Psyshock lands on Mega Venusaur, critting it, while I live with 1 HP and Synthesis up. His Venusaur Sludge Bombs my Venusaur back down into red with Sludge Bomb.
T5: Salamence/Venusaur vs Meowstic/Venusaur
While I know that it’s incredibly likely that he’s going to switch Meowstic into Azumarill here, I still need to go for the Dragon Pulse, since if Venusaur faints I’m in a bad spot. As for Venusaur, he can either waste attacks into it while I spam Synthesis, or I get myself back up to over half health, either works for me. He does switch Meowstic into Azumarill while I Synthesis and Salamence takes over half from the Sludge Bomb.
T6: Salamence/Venusaur vs Venusaur/Azumarill
At this point, I know the only way he can take out my Venusaur is with a combination of attacks that deal around 40%. If I can Synthesis back up to full health, I put myself in a great spot for the game. His Azumarill will almost certainly Protect here, so I can Synthesis and Dragon Pulse his Venusaur, sacking Salamence, which is exactly what happens, with his Venusaur ending up with around a third of its health remaining.
T7: Venusaur/Talonflame vs Azumarill/Venusaur
This is an example of one of those turns where you really don’t have to worry about much of anything. I know that his Venusaur is almost certainly going to either Protect or switch here, but I can’t afford to Brave Bird his Azumarill, since the recoil will put me in rage for an Aqua Jet to KO me. To make sure that there’s no chance of me losing a Pokemon this turn, I opt to just Brave Bird the Venusaur and Leaf Storm the Azumarill, knowing that even if he switches Azumarill out into Rotom, he loses any good switch ins for my Talonflame’s Brave Bird and I know that I have better resources for my Venusaur than he does in any case. Not surprisingly, he does end up Protecting his Venusaur and switching his Azumarill into his Rotom-H, with Leaf Storm doing around 35%
T8: Talonflame/Venusaur vs Rotom-H/Venusaur
So the odds of him switching out Venusaur here are pretty much 100%. This isn’t going to be the case against every player, but based on the way he’s been sheltering his Venusaur, I’m pretty confident about it. That means that his Rotom is aiming Thunderbolt straight at my Talonflame, expecting my Venusaur to switch. Obviously the best way to capitalize on this is to switch out my Talonflame and Sludge Bomb his Rotom, doing enough damage that any attack will be able to KO it, making its threat level next to nothing. I’m right about his move, as he switches in his Venusaur for his Azumarill and I switch my Talonflame into Rotom, which takes around 50 from the Thunderbolt. Sludge Bomb hits his Rotom and ends up knocking it out with the third critical hit of this game for those of you keeping score at home.
T9: Rotom-Wash/Venusaur vs Azumarill/Venusaur
Looking at my options, there’s no way that I can risk switching at this point; Talonflame laughs at his entire team. However, any attack I go for on to his Azumarill is pretty likely to end up being blocked by Protect, and even if he switches, that’s a very winnable spot for me. Based on this, I opt to Protect both on my side in hopes of baiting out his Azumarill’s, which ends up working out as he Protects and Giga Drains.
T10: Rotom-Wash/Venusaur vs Azumarill/Venusaur
I hazard a guess that he’ll save his Azumarill by sacrificing his insanely low health Meowstic from the back, so the decision comes down to what he’ll do with his Venusaur. Giga Drain on Rotom seems like the most obvious option, though I have to be a bit paranoid of him expecting that and covering the Talonflame switch in with Sludge Bomb. I know that’s not going to KO, so I should still be in a very strong spot regardless. He opts to cover my switch however by Aqua Jetting my Rotoms slot, now a Talonflame, as I survive with 31 HP. Now I’m really, really hoping that he didn’t make the manly call and Sludge Bomb as well. My Sludge Bomb hits his Azumarill doing half and revealing the Sitrus Berry, as he ends up going for the…. Giga Drain onto Talonflame, which easily survives.
T11: Talonflame/Venusaur vs Azumarill/Venusaur
In retrospect, that turn had a lot of unnecessary risk to it, and now the game is up for grabs. However, one thing I have on my side is that I will win the Venusaur mirror if it comes down to it, as I’m pretty confident at this point saying that he lacks Synthesis. I can’t afford to keep Talonflame in anymore, his Venusaur’s too likely to protect and I really don’t want to KO myself from recoil onto his Azumarill, or get myself into a Venusaur/Meowstic vs Venusaur/Rotom either. Being pretty confident that he’ll Protect and Aqua Jet, I decide to Leaf Storm his Azumarill and switch into Rotom. Fortunately for me I’m right, as Rotom takes negligible damage and I’m able to score the KO on his Azumarill. At this point I’m able to comfortably win with Venusaur and Talonflame after taking out his Meowstic
Win 2-0.
Game 2 vs Jason I.
That game was way closer than it should have been based on my advantageous matchup, I need to finish game 2 on a much more solid note. I know that I need to lead Talonflame and not giving him the opportunity to do any damage with Venusaur is going to be very important. Even if he does lead with his Rotom, mine should be able to pressure him against taking too much of an aggressive stance. I feel like I should still keep the 4 I brought however and put Venusaur and Salamence in the back.
T1: Rotom-W/Talonflame vs Meowstic/Venusaur
Well this is pretty fantastic, not only am I pressuring his Venusuar, but his Meowstic can’t really do anything aggressive, leaving me free to just take pot shots. Considering how I played my Talonflame vs his Venusaur last game, and with the chance that he’ll get a bit more aggressive after losing the first game, I decide not to take any chances and just Brave Bird his Venusaur. For my Rotom, just getting damage onto the Meowstic is my priority, and Will-O-Wisp missing would be annoying, so I decide just to Thunderbolt. He switches out his Venusaur, revealing the Drapion and Charms my Talonflame, with Thunderbolt doing around 30% to his Meowstic. I’m kind of confused why he didn’t just Protect his Venusuar if he had Charm, but looking gift horses in the mouth isn’t the best course of action right now.
T2: Rotom-W/Talonflame vs Meowstic/Drapion
I’m not going to lie, I have no idea what Drapion does. What I do know is that it really probably isn’t doing too much to me, so leaving it on the field is probably my best course of action, since if he brings in Venusaur vs my -4 Talonflame, I might have some problems. Knowing this, I decide that just switching Talonflame into Salamence is my best course of action, since if it can’t do much normally, it certainly won’t be doing much at -1, and I’m pretty sure that Drapions use their Attack stat. Surprising me, he sets up the Light Screen with Meowstic instead of another round of Charm. His Drapion reveals the Rock Tomb on my Salamence, doing 46 hp, and I guess I can’t really be surprised since after all Rock Tomb is the common Drapion set. Thunderbolt connects onto his Meowstic, as I get another critical hit onto his Meowstic, dealing around 50% to it.
T3: Rotom-W/Salamence vs Meowstic/Drapion
Now that I can KO both of his Pokemon now (unless Drapion is actually a Specially Defensive tank) I decide to just go for it, with the Thunderbolt onto Meowstic and Dragon Pulse onto Drapion. I know that he can double switch, but if I fail to pick up the KOs here and they stay in, that might be big trouble, especially if his Drapion has Knock Off. I don’t know if it can learn Knock Off, but it looks like it can. He ends up saving his Meowstic but not his Drapion, with Salamence knocking it out with a Dragon Pulse and Thunderbolt getting a critical hit on his Venusaur for around 20%, rubbing salt in the wounds.
T4: Rotom-W/Salamence vs Venusaur/Azumarill
Alright we’ve done this song and dance before, you’re going to protect Azumarill and Giga Drain my Rotom, so I’m just going to Protect and Dragon pulse your Venusaur, besides even if my Salamence does faint, it really isn’t helping with his remaining 3 much anyways. He surprises me and doesn’t protect with Azumarill, but instead opts to Play Rough my Salamence, KO’ing it and tying the game up at 3-3.
T5: Venusaur/Rotom-W vs Venusaur/Azumarill
At this point he really doesn’t have much to deal with my Venusaur, so I’m just going to go to town. His Azumarill really can’t do much here, so I’m pretty sure it’ll either Protect or switch, doesn’t really matter if he strays from that. My move to win here is going to be getting rid of his Venusaur, so I opt to Sludge Bomb and Will-O-Wisp it, knowing that if I get it to the point where I can knock it out with Sludge Bomb, I’ll have the game in the bag. He does Protect his Azumarill, with my double attack targeting his Venusaur successfully, doing around 25% with Sludge Bomb. He decides to get some damage onto my Venusaur with Sludge Bomb, doing around a third.
T6: Venusaur/Rotom-W vs Venusaur/Azumarill
Alright at this point I should win. His only out is going to require setting up a Belly Drum, so to crush that hope I’ll Will-O-Wisp it and Sludge Bomb his Venusaur. He switches Azumarill into Meowstic. His Venusaur faints from Sludge Bomb and his Meowstic faints from the burn damage.
T7: Venusaur/Rotom-W vs Azumarill
Nothing to think about here, except for that I’m one game away from locking up my invitation to Worlds, as Sludge Bomb OHKOs his Azumarill and I win 2-0.
First thing I do after winning is find out who else is 2-0. A quick investigation shows that myself, Jeudy, and Simon are all 2-0 which is pretty incredible. I also go up to Toler to check in on him and it turns out that he’s 2-0 as well, meaning both of us are one game away from Worlds. We go up to the pairings board as Toler keeps saying “I really hope I don’t have to play you.” Of course when we get to the pairings board, turns out we have to play! Side note: if you come up and tell me that you don’t want to play me, we will play. Either that or Toler and Andy are massive jinxes, but still.
Round 3 vs Toler Webb (Dim) [3-3]

Game 1 against Toler W.
Last time I played Toler it was top 8 of Worlds in 2012, where he beat me and went on to win the tournament, so the motive of revenge flashes through my mind a bit. The double Dragon and Charizard kind of forces me to lead Salamence here. Just by looking at the team, this is not going to be a good time for either one of my Mega Evolutions, but Lucario is probably the better choice here just because it can get KOs on Hydreigon and Gardevoir. With him having Zapdos though, I feel like there’s a decent shot that he’ll lead it as an answer to Salamence if he doesn’t go with his Trick Room mode, so I lead Mamoswine as a counter attempt. I also figure that if he brings Trick Room, and along with it not Charizard, Mamoswine is going to be able to put in some serious work. For the last Pokemon, Rotom really isn’t doing much here besides landing a Will-O-Wisp onto Mawile, so Talonflame it is.
T1: Salamence/Mamoswine vs Zapdos/Hydreigon
I’m pretty terrified of Mawile right now to be honest, and I know that that Hydreigon has to switch out here. He’s either switching out into Gardevoir or Mawile, so fire blasting Hydreigon makes sense in order to punish the switch in. For the Zapdos, even if he KOs my Salamence, I take out his Zapdos, so I’m at worst trading. He does switch, but unfortunately it’s into his Gardevoir, and to add to this, he traces Intimidate, meaning that Icicle Crash won’t be able to knock out his Zapdos. To relieve the pain a little though, I end up doing 30% to his Gardevoir as well as a Burn, but the Icicle Crash on Zapdos falls short of the KO at only 75%, leaving his Zapdos to be free to knock out my Salamence with Hidden Power Ice.
T2: Lucario/Mamoswine vs Zapdos/Gardevoir
Surprisingly enough it turns out that my Mamoswine is faster than his Zapdos, which will be helpful. While I know that he can switch, I really don’t think any of his Pokemon want to take a Flash Cannon. However, his Mega in the back will be fine switching into an Ice Shard. In case he decides that switching out Zapdos is his best idea, I Icicle Crash that spot for a potential punishment. He doesn’t switch however and I get a clean KO on both of his Pokemon. It’s at this point that the crowd starts cheering for Smeargle, very loudly, right into our ears. Toler’s more affected by it than I am though, and the cheers might have affected some of his judgment calls.
T3: Lucario/Mamoswine vs Charizard/Hydreigon
Not going to lie, I assumed this entire time that he had Mawile in back, so this changes some things. Considering that he just stayed with Collin before nationals and Collin had Choice Scarf on Hydreigon, it seems like a pretty decent chance he has it. I should have this game in the bag however if I can just get Talonflame in for free, so I decide that protecting Lucario and Ice Sharding, allowing Brave Bird to potentially KO, would be the best idea. In addition to this, I might be able to learn what item his Hydreigon is. Ice Shard does around 20% to his Charizard, and his Hydreigon goes for the Dragon Pulse onto Mamoswine, knocking it out and confirming that it was a Choice Specs variant.
T4: Lucario/Talonflame vs Charizard/Hydreigon
No real reason to go for anything besides Aura Sphere onto Hydreigon and Brave Bird onto Charizard, though I do end up getting a Critical Hit to KO his Charizard, which mattered in the damage roll apparently but not for the overall result of the match, giving me the 1-0 win.
Game 2 vs Toler W.
After what happened in Game 1, I think that he’ll try the Trick Room lead this time. That means that I should probably lead Talonflame and keep Mamoswine in back, since Intimidate is very annoying for it. Salamence should still be good here as a lead though, and Lucario did work last time so might as well have it in the back.
T1: Salamence/Talonflame vs Hydreigon/Gardevoir
Gardevoir traces Intimidate. With Intimidate up I know I’m not going to be able to KO his Gardevoir, however, I can do enough damage to it so it’s no longer a huge threat. As for his Hydreigon, given the play I made last game, I doubt he’ll switch out here, since either he gets a free switch to Mawile under Trick Room or if I Fire Blast and he stays in, he’s in a monstrously advantageous position. Because of all this, I decide that Draco Meteoring the Hydreigon is the best plan along with a Brave Bird onto Gardevoir. He does end up staying in and gets one shot by Draco Meteor, Brave Bird does 60% to his Gardevoir which activates the Sitrus Berry and he sets up Trick Room.
T2: Salamence/Talonflame vs Gardevoir/Zapdos
I’m actually really surprised that he didn’t bring in Mawile here, which gives me a bit of a break. In any case, his Gardevoir is surely fearing the Brave Bird and will probably switch, since I doubt that he has Protect on it given it’s a Trick Room variant. In order to prevent his Zapdos from doing anything very useful, I decide to just double switch, Lucario for Salamence, Talonflame for Mamoswine. He switches Gardevoir into Mawile and Thunderbolts into Mamoswine.
T3: Lucario/Mamoswine vs Zapdos/Mawile
It is at this point that I must advise the readers that I have no idea why I made the decisions I did looking back at my notes. I guess that the crowd got to me but I can no longer explain my reasoning behind most of my moves for this game. I decide to double Protect, probably to burn out Trick Room, despite the lack of danger onto Lucario. He Iron Heads into Mamoswine and Thunderbolts Lucario.
T4: Lucario/Mamoswine vs Zapdos/Mawile
I double switch on this turn. I know that I need to keep Mamoswine alive so that makes sense, but I’m not sure why I valued Lucario so highly here. In any case I get punished and lose both Talonflame and Salamence
T5: Lucario/Mamoswine vs Zapdos/Mawile
This turn I do understand, at least on my end. Double Protecting here is clearly my best play. For some reason Toler doesn’t see this however and ends up Protecting his own Mawile.
T6: Lucario/Mamoswine vs Zapdos/Mawile
Now it’s time to play the prediction game, whether he’ll keep his Mawile in or not. If he does keep it in then my best move is to actually KO my own Lucario with Earthquake in order to finish off his Mawile. If he switches out, my best move is to Flash Cannon Mawile and Icicle Crash the Zapdos. Given my options, I decide that expecting the switch out is my best move. Even if he doesn’t switch and stays in, I still win if I flinch with Icicle Crash or get a Critical Hit on either one of my moves, tipping the scales in my favour. Fortunately I don’t have to worry about that, as he does end up switching his Mawile out into Gardevoir and I get a double KO
T7: Lucario/Mamoswine vs Mawile
I easily KO Mawile and win 2-0.
With that game done, I am officially qualified for Worlds! With that out of the way, my next goal to reach is Top 8 to get the potential trip, and once I get that try to pull off the repeat.
Round 4 vs Adib Alam (honchkro13) [2nd place]


You can actually watch these games on TeamRocketElite’s YouTube page so I’ll spare you the play by play in exchange for some interesting notes.
Okay so he isn’t running a Steelix this year. Regardless, that Kangaskhan/Amoonguss/Gyarados is going to be bad news bears for me unless I can seriously play my way out of this. I decide that I need to bring Lucario here, since while Venusaur will do well vs most of his team, it’s pretty clearly centered around Kangaskhan, meaning if I take that out I should win. However, with him seeing the Lucario he’s for sure going to have some way to not let it immediately destroy him, which means that he’ll probably lead Amoonguss with Kangaskhan, or maybe Aegislash with Gyarados. Either way, Rotom-Wash and Mamoswine will be my best bet for leads. With the threat of his Kangaskhan, I’m going to have to have Salamence in back along with my Lucario.
Game 1 vs Adib A.
Game 2 vs Adib A.
Game 2, Turn 1: Kangaskhan/Tyranitar vs Lucario/Mamoswine
I have to give Adib a lot of credit here, I had to switch Lucario out for fear of the scarf Tyranitar and he knew that my Mamoswine was probably protecting so he goes for a really smart Power Up Punch here, which definitely earns respect from me.
Game 3 vs Adib A.
Game 3, Turn 4: Mamoswine/Lucario vs Aegislash/Gyarados
To be 100% honest, the only reason I made this play was I was assuming that at least one of my Pokemon would survive the turn for sure, thus giving me the win. I knew I could switch out Mamoswine into Salamence but didn’t want to risk him going for a balls to the wall Ice Fang. However, I actually forgot that my Mamoswine would faint to Life Orb recoil, and as soon as I saw it faint I knew I lost. Simple brain farts like that suck but it happens.
After the set I gained a lot more respect for Adib as a player than I had in the past, but I still really wanted to make top cut so I couldn’t stop trying now. My first two opponents were both doing pretty badly (1-3 each) so I knew that if I wanted to top cut I would need to win my next two games.
Round 5 vs Erik Holmstrom (Cyrus) [3-3]
Well at least I’m going to be playing a familiar face. Erik and I have played three times just at the two Premier Challenges I went to, so I was pretty familiar with how he played: defensively.

So he’s either running no Mega or Mega Aerodactyl. The most obvious part about his team though is that it’s bulky. Really, really bulky. As previously stated, I know that with Mega Venusaur I can win pretty much any war of attrition, so feel good about the matchup. However, I don’t want to get into a bad spot early with a potential Sky Drop, so I opt to lead Talonflame and Rotom-W, knowing full well that anything that the lead could have trouble with would be easily switched into. Venusaur in back is pretty obvious, but for the last slot, just out of fear for the Aerodactyl I opt to run Mamoswine in back.
Game 1 vs Erik H.
T1: Talonflame/Rotom-W vs Scrafty/Klefki
I think this is the least offensive pressure put on me by any lead this tournament. His Scrafty is pretty clearly threatening with Fake Out, but I think it makes sense for him to actually go for the Stone Edge on Talonflame, knowing that his Scrafty can survive any one attack. Based on that, I think the best play here is to double target his Scrafty. It turns out I’m right as his Scrafty faints while his Klefki sets up a safeguard.
T2: Talonflame/Rotom-W vs Rotom-W/Klefki
And now is the time to switch out Talonflame, which will switch into Venusaur very well here. For Rotom, I decide that the best course of action is to just start dealing some damage to his Klefki, a well as prevent any potential switches to Aerodactyl, so I opt for the Thunderbolt. He ends up using Rain Dance with his Klefki, which takes around a quarter of its health from the Thunderbolt, and Venusaur takes a bit more than that from his Rotom’s Hydro Pump.
T3: Venusuar/Rotom-W vs Rotom-W/Klefki
With there being no threats to Venusaur on the field, I’m pretty sure that he’ll try to do something to remedy that, probably with his back Pokemon. I really don’t want to risk Leaf Storming into an Amoonguss and putting myself into a weird spot, so I decide that just Sludge Bombing his Rotom is my best play. For Rotom, the plan of continuing chip damage onto Klefki is still in effect, but with rain dance up it seems like a waste not to go for the Hydro Pump. He swaggers my Venusaur so I know I’m in for a fun time, but my Sludge Bomb does connect, dealing around 40% to his Rotom as we both miss Hydro Pumps. His Rotom has Leftovers revealed to me.
T4: Venusaur/Rotom-W vs Rotom-W/Klefki
From this point on the game pretty much just becomes him Swaggering everything on my side of the field while not being able to touch Venusaur, so I win pretty easily, but it takes a long time, win 3-1
G2 vs Erik H.
Considering how light his offensive pressure was Game 1 I know he’s going to want to change that up, and his best option for doing so is going to be with his Aerodactyl, so I’ll lead Rotom-W/Mamoswine to counter it. I liked having Talonflame for Amoonguss so I’ll keep that in back and Venusaur is a no brainer.
T1: Mamoswine/Rotom-W vs Scrafty/Aerodactyl
I was right, and started with a nice and safe move here by protecting Mamoswine and Will-O-Wisping the Aerodactyl. I know that my Rotom won’t be able to KO, and preventing it from doing any significant damage will go a long way. That plan doesn’t exactly work though as he switches Aerodactyl into Amoonguss and Fakes Out my Rotom for chip damage.
T2: Mamoswine/Rotom-W vs Amoonguss/Scrafty
I know that with his lack of damaging options, he’s going to be hard pressed to actually knock out my Mamoswine, meaning that I actually have free reign to go for the Icicle Crash on it, which will do over half at least. In addition, with him being forced to Spore Mamoswine here, I can be free to Will-O-Wisp Scrafty or whatever he switches in. Considering he has Safeguard on Klefki I’m decently confident that his Scrafty isn’t holding a Lum berry. He switches Scrafty to Rotom, as Icicle Crash misses, his Rotom gets burnt and my Mamoswine takes a nap.
T3: Mamoswine/Rotom-W vs Amoonguss/Rotom-W
Well at this point it’s time to get in the Venusuar. I don’t want to eat a Spore and Venusaur isn’t afraid of anything Amoonguss or Rotom-W can throw at it, so I don’t really see any downside. He reveals one however and switches his Rotom into Aerodactyl and Rage Powders.
T4: Venusuar/Rotom-W vs Amoonguss/Aerodactyl
So the Sky Drop is probably incoming, but if he wants to do that then he’s going to need to save his Aerodactyl with a Rage Powder in case I Protect. I decide that on the off chance he doesn’t Rage Powder and what will be the best move in case he does, I protect Venusaur and Will-O-Wisp his Aerodactyl, which gets redirected to his Amoonguss as Venusaur blocks a Sky Drop.
T5: Venusaur/Rotom-W vs Amoonguss/Aerodactyl
Considering that Sky Drop is a new move to VGC I don’t know too much about it, the only thing I really do know for sure is that Wisconsin is too fat to get lifted up, so I’ll switch Venusaur into that. As for Rotom, I’m going to continue just taking potential pot shots at his Aerodactyl, and worst case scenario: I’m doing chip to Amoonguss which I am just fine with. He does Rage Powder, but he actually goes for the Rock Slide instead of the Sky Drop, doing decent damage to both of my Pokemon. Thunderbolt on Amoonguss deals around 10% damage.
T6: Mamoswine/Rotom-W vs Amoonguss/Aerodactyl
Now we play a game I like to call “Please wake up Mamoswine”, which I will attempt to do by leaving Mamoswine as bait and protecting Rotom, as I assume that now is as good of a turn as any for him to switch up his gameplay and protect Aerodactyl. I’m wrong about this however, as he decides to continue the status quo with the same moves from the previous turn.
T7: Mamoswine/Rotom-W vs Amoonguss/Aerodactyl
At this point his Amoonguss is at pretty low HP, but so is my Mamoswine. I decide that at this point baiting the wake up is my best option, and I know that his Amoonguss is on its last legs unless it switches, so I take that as the go ahead to Thunderbolt his Aerodactyl. We both have the same idea of protecting our low health Pokemon. Luckily for me my Mamoswine wakes up. Unfortunately for me he switches out his Aerodactyl to fight another day for his Scrafty, which takes around 20%.
T8: Mamoswine/Rotom-W vs Amoonguss/Scrafty
His Amoonguss is about to go into red from burn damage at this point which is always nice. Continuing my slow approach to this matchup, I decide that just double Protecting here was smart, since even if he switches I can abuse it. He does switch Amoonguss into his Rotom and Fake Out gets blocked by Protect.
T9: Mamoswine/Rotom-W vs Rotom-W/Scrafty
At this point AlphaZealot does his end of the round check to see how much longer the games will take, considering we were one of 5 games still being played this wasn’t shocking. “Good this game only has 5 minutes left” and I have to break his heart by reminding him that we were still on game 2. At this point I’m pretty sure that he’ll want to get his Amoonguss back in ASAP, since without it he really can’t put much pressure on at all. However to keep my option safe I decide to Will-O-Wisp Scrafty in case it decides not to switch out. Luckily for me this all works out as he does switch in Amoonguss, which takes around 50% from Icicle Crash. He actually expected me to switch out Mamoswine here, so he goes for the Thunderbolt on Rotom, which lands a critical hit and I survive with 20 HP and recover more with Sitrus Berry.
At this point I either have the game locked up to time or just got bored since I stopped taking notes, but I ended up winning 3-2 on time after he lost his Amoonguss’ ability to take hits.
After the game, I remind Erik that if he wins his next game, he actually gets his invitation to worlds. But being the nice guy that he is and knowing that he couldn’t make it, he doesn’t want to grinch a spot that won’t be used. While I appreciate that, partnered along with my already craptacular resistance, I know that I have zero chance of making it in as a 4-2, meaning that next game is an all or nothing, win and I should get the paid trip, lose and I only get the worlds invite.
Round 6 vs Alex Ogloza (Evan Falco) [1st place]
Now Alex and I have a bit of history, we’ve only played once but it was kind of killer. In Arizona Regionals, I single handedly eliminated him from the tournament. In Round 4 he played Natalie Kaspszak (Maski) who I gave my team to use and lost, and in Round 5 he played me and lost. He won the rest of his games but bubbled at 9th by .06% resistance, so I know that he’s at least motivated to win this time.
I would like to thank all of the Japanese players I faced in the June International Challenge for teaching me how to play this lead. In my experience, no Kangaskhan and Talonflame rain team has ever lead the Kangaskhan/Talonflame part against me, so I’m entirely confident about seeing the Ludicolo/Politoed lead. I go with my default team against rain, Venusaur/Rotom-W with Talonflame/Salamence in back.
Game 1 vs Alex O.
T1: Venusaur/Rotom-W vs Talonflame/Kangaskhan
This is the first time I’ve seen the leads I wasn’t expecting from this team. In any case, his moves are pretty clear here, he’s going to Fake Out Rotom and Brave Bird Venusaur. My best way to beat that is to switch Venusaur to Salamence and Protect Rotom, and he does exactly what I expect him to. The damage on Salamence reveals that his Talonflame is Choice Banded.
T2: Salamence/Rotom-W vs Talonflame/Kangaskhan
I cannot afford to let that Kangaskhan get away unburnt. And for Salamence, going with Rock Slide is probably my best option, since even if I find myself in a bad spot I can just threaten with flinches. He ends up pulling a double switch with his Politoed getting burnt.
T3: Salamence/Rotom-W vs Ludicolo/Politoed
Unfortunately since my Venusaur hasn’t mega evolved I can’t afford to switch into it. I’m pretty afraid of the Giga Drain on Rotom-W at the same time, and I’m also afraid of him Scalding my Salamence in case I bring in Talonflame! I’m scared of everything at the same time, so I decide to just sack my Salamence as he Ice beams Salamence and scalds my Rotom.
T4: Talonflame/Rotom-W vs Ludicolo/Politoed
I realise as soon as I make my switch in that I made a terrible mistake. Thinking over the options in my head, I realise I only have one option now, which is to hope I get a double protect on Venusaur. I trade Talonflame for both of his Pokemon, but this is still hardly a good spot.
T5/6: Venusaur/Rotom-W vs Talonflame/Kangaskhan
I know Turn 5 I need to double Protect, which I do. Turn 6 I need to hope I get a second protect on Venusaur and then have some other sort of miracle happen, but it doesn’t come as the Protect fails and I lose my first game 1.
Game 2 vs Alex O.
I’m willing to bet that he’ll switch it up expecting me to switch to better prepare for his Politoed/Ludicolo lead, so I decide to keep everything the same. I take a moment and focus more, since I know I can play better than I did in my first game and if I want to make top 8 I’m going to need to play much better.
T1: Rotom-W/Venusaur vs Politoed/Kangaskhan
Alright not quite the rain mode, but it still works for me. His Politoed is doing very little and his Kangaskhan can only Fake Out one of my Pokemon, so attacking him with Sludge Bomb and Will-O-Wisp is going to be my best option. He switches Politoed into Talonflame realising how pointless it is leaving him in. Rotom gets Faked Out but Sludge bBomb connects on his Kangaskhan and does around 70% to it with a Critical Hit.
T2: Rotom-W/Venusaur vs Talonflame/Kangaskhan
On top of keeping Venusaur safe, switching it out here is going to accomplish another one of my goals, keeping Rotom-W safe. If I Intimidate his Talonflame and Kangaskhan I think that I should survive. He goes for the U-Turn and Return on Rotom, which I survive pretty decently, and am able to KO his Kangaskhan with a Thunderbolt.
T3: Rotom-W/Salamence vs Ludicolo/Politoed
I know that I can put on a lot of pressure with Draco Meteor, and depending on what move his Politoed locks into I know what move I need to go for to seal the win. Just for his Talonflame though I’m going to want to keep my Rotom alive at its 34 hp so I opt to Protect. However, he double attacks my Salamence with Fake Out and Ice beam and knocks it out, but this does set me up for a very strong play.
T4: Talonflame/Rotom-W vs Ludicolo/Politoed
No reason to go for anything besides the Brave Bird on Ludicolo and Thunderbolt on Politoed, since he’s forced to keep both of his Pokemon in. Brave Bird OHKOs his Ludicolo, and his Ice Beam does 17 hp to Rotom, while my thunderbolt does around 70ish percent to his Politoed.
T5: Talonflame/Rotom-W vs Talonflame/Politoed
I figure at this point the worst I’m in was a speed tie and a damage roll. However I did not know that his Talonflame was Jolly, so he out speeds mine easily and OHKOs it, and I know that I’m going to have to survive this Ice Beam as my Rotom’s HP goes down, down… and I shout out “1 HP!” in disbelief, as I’m able to cleanly knock out his Talonflame and win very easily from that point 2-0. After doing later calculations, it turns out I got very, very lucky with damage rolls, as Ice Beam only does 16 hp 3 times out of 16.
Game 3 vs Alex O.
That was actually the third time I’ve had an official event game come down to 1 hp, and the third time it’s been in my favour. But this is the first time it wasn’t thanks to a Focus Sash. This game, I’m pretty sure he’ll go back to the Kangaskhan/Talonflame lead that worked so much better for him in the first game, so I’ll counter with a Talonflame/Salamence lead of my own with Rotom and Venusaur in back of course.
T1: Talonflame/Salamence vs Kangaskhan/Talonflame
This is a really good time to be right about what he brings. I know his Talonflame is not going to want to stay in here, so I figure that my best course of action is to double target the Kangaskhan, since at worst he Fake Outs and I still get off good damage, and otherwise I knock out the biggest threat on his team. He switches out Talonflame into Politoed and I see my Talonflame go first, and I see the Kangaskhan faint after a satisfying Brave Bird and Dragon Pulse.
T2: Talonflame/Salamence vs Politoed/Talonflame
Mind you I don’t know that his Talonflame is jolly at this point, so I figure right now I’m at worst risking a speed tie and Dragon Pulse might be able to pick up the KO. Even if that fails, I’m pretty confident I can win the 2v3, since he can’t afford to switch in his Talonflame at any point. He wins the “speed tie” again and KOs my Talonflame, and his lives in the red after a Dragon Pulse. Fortunately for me, he decides to switch out his Politoed into Ludicolo fearing giving me a positional advantage if I switch in Rotom.
T3: Venusaur/Salamence vs Ludicolo/Talonflame
Now this might seem a bit silly bringing in Venusaur here but I have a plan, given how low his Talonflame is I think that if I can bait him into Brave Birding my Rotom, he’ll KO itself from recoil and give me the win. As for Salamence, in the case it doesn’t get Faked Out I’m assuming he’ll switch Talonflame to Politoed, so I opt to Dragon Pulse his Ludicolo. He does go for the Fake Out and the Brave Bird hits Rotom, doing a sizable amount (53 HP) and his Talonflame’s health goes down to just a tiny sliver.
T4: Rotom-W/Salamence vs Ludicolo/Talonflame
I think it’s pretty obvious that that Talonflame is switching out and he’s going to take out my Salamence, so I decide that double targeting into his Ludicolo so Sludge Bomb can KO will be my win condition. I’m right fortunately and his Ludicolo gets knocked down to below half health in exchange for my Salamence.
T5: Rotom-W/Venusaur vs Ludicolo/Politoed
Despite being down in number of Pokemon I know I have the positional advantage, I just need to Protect and Sludge Bomb and I should win. Should is dependent on him not pulling an Enosh and attacking his own Pokemon however, as he recovers enough health from Giga Draining his own Pokemon in order to survive my Sludge Bomb, and now I need to hope I don’t get Critical Hit by Giga Drain.
T6: Rotom-W/Venusaur vs Ludicolo/Politoed
To increase my odds a little bit I decide to go for the second Protect in addition to the Sludge Bomb. It fails, but I’m able to survive the Giga Drain and KO his Ludicolo.
T7: Rotom-W/Venusaur vs Talonflame/Politoed
At this point I only lose if I get frozen by Ice beam, which Rotom manages to avoid, as I take the set 2-1 in probably the closest I’ve ever had.
Looking at the standings, I find myself as the 6th seed, with a familiar name in the 8th slot. And the first second and fourth. This is actually the first time my resistance at a tournament has ever been bad, as I once bubbled Norcal regionals in 2012 with the highest resistance ever in a VGC event without byes – 81%. Instead I see that mine is somehow under 50% which is a little gross. However, I notice that with me, Ray, Jeudy and Simon are all in top 8 and not playing each other, so we have a chance to get an all imouto top 4. In addition, getting top 8 gives Jeudy his first Worlds invite so congrats to him. I try to prepare for my game vs Logan, but since Simon and Jeudy went off to strategize, I can’t find anyone who knows anything major about the team for a long time. Fortunately I’m finally able to find someone who knows that he’s using Scarf Gyarados, but that’s the extent of what I know going into this match.
Nationals – Top 8
Round 1 vs Logan Castro (Yellowbox) [3rd]
My game vs Logan is in the Pokémon stream archive if you want to check it out, so instead I’ll just point out specific turns.
Game 1, Turn 2
Considering he just tried to Thunderbolt my Lucario, I’m guessing it’s an offensive set so staying in is dangerous. However, I need to try to get the KO on his Kangaskhan. With two Pokemon that can completely cripple it, it doesn’t make sense to me for him to keep it in, instead it makes the most sense for him to switch it into his Chandelure assuming he has it. Even if he doesn’t, switching is his most likely move. I then pay for this with a Power Up Punch to the face as I try to Hydro Pump the switch in. While I understood the Power Up Punch from Adib, I honestly don’t understand this one, and feel especially bad about it after learning that his Zapdos was actually a bulky light screen variant.
Game 2
My best chance of winning is to simplify everything and lead Salamence, and just hope that he won’t bring Bisharp. Given how useless Talonflame was I don’t see myself regretting swapping it out. As you see this works out
Game 3
Given how well I did when I lead Salamence, I’m pretty confident that he’ll choose to lead Bisharp, so I decide to lead Lucario/Rotom-W again. I’m completely dumbfounded by him leading Chandelure once again.
Game 3, Turn 7: Mamoswine/Lucario vs Gyarados/Bisharp
So I suppose I owe an explanation for the headslapping. My thought process for this turn was, given how much pressure he can put on my Mamoswine by threatening the Waterfall and how easy it is for me to protect, I doubt he’ll actually go for it and instead double attack my Lucario with Waterfall and Sucker Punch. As soon as I lock in my move I realise my mistake and hope that despite him being locked into Ice Fang, which I completely forgot about, he still goes for the double target. Unfortunately for me he doesn’t and I lose. While I can’t say for sure that I would have Earthquaked if I remembered he was locked into Ice Fang, I think I was pretty damn likely to considering how relatively safe it is. So I’m just sitting there thinking, I just lost my chance to repeat because of a simple mistake like that, I was pretty frustrated so I just let it out all at once.
Fortunately for me though I did get some condolences in the form of prizes. In addition to the hat and cards I actually managed to get a good prize due to my pretty excellent season, netting me 4th in Championship Points. It’s very hard to complain about a paid trip to Washington DC, especially when you live on the west coast, and considering that I met my pre-tournament goal, I’m satisfied. Unfortunately, somehow all of the imoutos managed to lose top 8 which was pretty saddening, but luckily Alex managed to win the event after our extensive testing the night before in the roleplaying room.
Pros
- Getting the Paid trip to DC
- Seeing Jeudy get his first Worlds invite
- Getting led around by drunk Ashby at 3 AM.
- Jivetime’s face
- Kids with uranium powered jetpacks
- The Sacrificial Thumb of Black Jesus
Cons
- Missing out on the repeat
- Seeing Simon bubble his invite for the 2nd year in a row
- Fire alarms
- Continuing my streak of losing tournaments to unexpected sets (Samurott/Torterra, Cinccino/Primeape, Choice Scarf Gyarados)
All in all a pretty fun event especially outside of the whole Pokemon part, and now I’m looking forward to helping team USA regain the World Championship title from team Axis (Germany, Italy, Japan)
About the Author
kingofmars Gavin has been playing VGC since 2011, with notable finishes including Top 8 at Worlds 2012 and 1st at 2013 US Nationals. He also keeps track of everyone's championship points in a format that isn't horrible to navigate. He will be attending the University of Southern California in the fall.
Related Posts
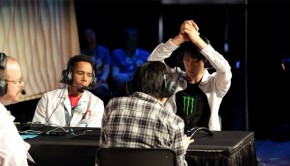
Memoirs of a World Champion: by 2015 World Champion SHADEviera →
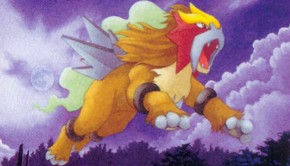
The Other Fire Doge: A Top 8 Lancaster Report →
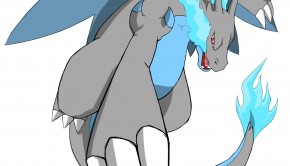
Blazing Forward! A Malaysian Regionals 2nd Place Report →
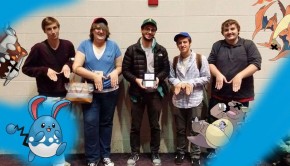
Top 4, Top 4, We’ve Never Used This Team Before →
17 Responses to The Komunist Manifesto: 8th Place US Nationals Report
Leave a Reply
You must be logged in to post a comment.


I didn’t realize, at the time, you were with us when Ashby us all around. But I do remember the talk of Black Jesus! It was cool getting to hang out with you for a bit! Congrats on your invite and I’ll see you this weekend!
A great read, did you note the moves each turn or did you just review the vid real quick after the round? Or is your memory like insanely great?
I didn’t have a clue about you as a player, kok, but after reading this, I acquired a great respect for you. Thank you for being so detailed in your matches’ chronicles, and good luck at Worlds!
I REALLY loved this report. I do love a good team build report to help me learn – but seeing your thought processes in each turn, why you switch, how you predict, etc, is amazing for those of us who are just starting to learn the competitive scene.
Really appreciate you taking the time to write it all up, you’re doing us a great service!
Are we having a report length arms race? First to 20k, perhaps? jk, congrats on T8 at Nats, Gavin.
Although we didn’t battle each other for at Nats, playing against you always ends up really entertaining, and tense, as we try to figure out when to make the YOLO play to try to call out the opponent’s prediction plays. I think I got to be the first person in the Summer Scramble to get executed by GIGA IMPACT.
I’ll see you in a couple of days. Good luck at Worlds.
I was pretty much pretending Day 2 never happened until reading this reminder today… LOL. Nice report man. Incredible detail. You were my only opponent that 2-0’d me too, just couldn’t close out that third game on a dismal day 2. Good luck at Worlds!
Kok, what an insanely detailed report! I can’t believe you play so well while at the same time recording everything that went down.
2 things:
As soon as I saw that you accidentally put extra special defense into your Rotom-W when you first bred it, I started doing the KOK-SLAP to myself. Wtf man.
Second, long live the Roleplaying room.
Great report, and thanks for helping me test the day before. It helped. A lot. I mean, you literally picked out the exact leads. I don’t know how you do it, but it’s no wonder I can’t beat you.
PS I hope you didn’t forget Arizona was a 0-0 finish, but even then I couldn’t win. GG.
reading over this it’s funny because 164 SpDef on a Calm Rotom actually hits the benchmark of surviving a Modest 252 Hydreigon’s Draco Meteor lol..
252+ SpA Choice Specs Hydreigon Draco Meteor vs. 252 HP / 164+ SpD Rotom-W: 132-156 (84 – 99.3%) — guaranteed 2HKO
Immensely detailed report, and thanks for mentioning me! I’m kind of curious as to what the outcome would be if I were matched up with you… which might happen at Worlds, who knows. Good luck!
Also, Giga Impact on Talonflame is really interesting, and something I might consider for future Banded birds… Not sure how I didn’t think of it since I’ve tested a Giga Impact Ninjask before.
I loved the report and the play by play. I feel getting an insight into how the top players battle is really useful and I can use it to try and improve. Also, giga impact Talonflame. I’d have never thought of that and it is a great creative choice.
I have been running a team quite similar in composition to yours for a good part of the season. I also found that Mamoswine can shine brightly against its supposed ‘checks’ thanks to a variety of great coverage moves!
Anyway, excellent report! I found the play by play not only impressively done, but really helpful in breaking down the surprisingly intricate thought processes of a top-tier player. I definitely got something out of reading this.
JiveTime’s face was the best. Hope we didn’t scar him too badly.
Great report! I absolutely loved the minute detail of the turn by turn analysis. Everything was great! I am confused about one thing though. How come you and ray delibirdly (<— like that pun?) tried to take yourselves out? Did I miss something?
Both Ray and Gavin were already guaranteed to make day two when they played each other, and since your placement doesn’t matter as long as you achieve 7-2 (which they both were guaranteed) they thought they should have some fun in thier match
As someone who spent two years in hellish Wisconsin and just moved, I greatly approve of your Mamoswine’s name.
Ahh okay. I was thinking it was because they were guaranteed to advance but wasn’t completely sure. Thanks for clearing that up for me!
Your welcome