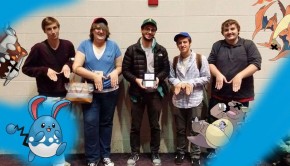
Mold Breaking a New Path, Follow Me!: Nugget Bridge Major and VGCS Winter Battle Report
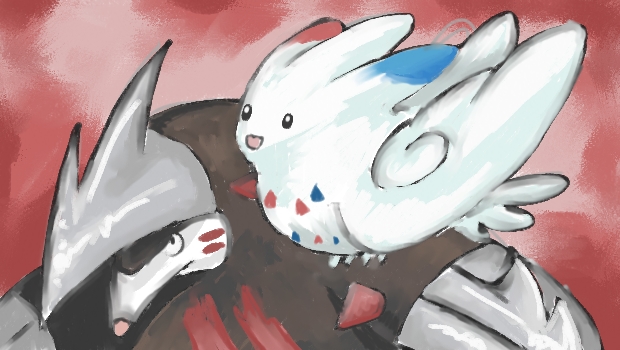
Article image created by feathers for Nugget Bridge. View more of her artwork on her tumblr or Nugget Bridge forums thread.
Hello, my name is Randy Kwa. Known as R Inanimate here on Nugget Bridge. I managed to reach the finals of the recent Nugget Bridge Major tourney, where I squared off against 2012 World’s Runner-up Wolfe Glick, and emerged victorious. In the tourney, I used the same team for the first 5 rounds, then used variations of the team for the semifinals and the final match. As much as I would have liked to use one team for the entire tourney, the ability to change teams between rounds is very dangerous, with the risk of potential counter-teams showing up increasing as the stakes grew.
I also used a version of this team in the 2012 VGCS Winter Battle, with some changes. I will go in depth about the first team for this report, as that’s where it all started, and highlight the changes made for the Winter Battle alongside.
The Team:
Upon the release of BW2, changes to the VGC metagame started to arise in the form of 5th Gen Dream World abilities, Therian Formes, and Move Tutors. I decided to try to build a team around one of these new BW2 updates. I quickly scrapped a team up on the Pokemon Online simulator, played a few battles, and ended up liking the team I made quite a bit. By coincidence, I already had 5/6 of the Pokemon already trained, each of them being a member of a different VGC teams that I have ran in the past. All I needed to do was train up the one new BW2 Pokemon for the team, and I would be good to go. The nicknames ended up being a total mess, as the teams of the past each had their own nicknaming theme, but I suppose it fits for a group of Pokemon that branched off from their former team. Since the Pokemon do not have flawless IVs, I have them written into my Pokemon’s descriptions:
The Team

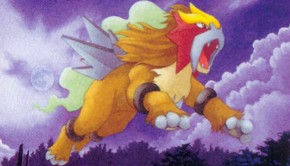
Salamence (F) @ Dragon Gem ***RH Exelion
Trait: Intimidate
IVs: 23/19/31/31/31/31
EVs: 4 HP / 4 Def / 244 SAtk / 4 SDef / 252 Spd
Modest Nature (+SAtk, -Atk)
– Draco Meteor
– Dragon Pulse
– Fire Blast
– Protect

Staraptor (F) @ Flying Gem ***Shurouga
Trait: Intimidate
IVs: 31/31/15/08/30/31
EVs: 252 HP / 4 Atk / 252 Spd
Adamant Nature (+Atk, -SAtk)
– Brave Bird
– Close Combat
– Final Gambit
– Protect
The original version of this team featured VGC 2012 Canadian Nationals Rain Team member Dragon Gem Salamence. There doesn’t really need to be much introduction to the destructive force of Dragon Gem Draco Meteors. The EV spread and moveset are about as basic as you can get. I went with Dragon Pulse as my 3rd attacking move over a move like Hydro Pump, despite the redundancy, since I wanted my Salamence to have a 100% accurate attack. Salamence’s role on the team was primarily to provide Intimidate support, while threatening to drop a meteor on the opponent every so often. Honestly, in the Majors, it did a lot of the former, and not much of the latter.
Salamence would later be replaced by Staraptor. Final Gambit Staraptor. I had to add a cool Pokemon to the team for those all-important style points. How many Pokemon do you know that run 252 Evs in HP and Speed? Having 192 HP allows Staraptor to deal with a wide variety of Pokemon it would normally have no business dealing with. For example: Bulky Thundurus, Metagross, Togekiss, Porygon2, and Ferrothorn make prime targets for dropping a 192 damage bomb on. Due to the Staraptor’s high base Attack, Brave Bird with a Flying Gem still packs a decent punch, hitting about as hard as a Hitmontop’s Gem Close Combat, but since you will take recoil damage, you will need to decide beforehand whether you want Staraptor to be using Final Gambit or attacking as normal. Staraptor pretty much saved my team against Wolfey in the finals, providing a quick way to KO his Gothitelle, Intimidate support, and hitting hard against all his Pokemon. In the Wi-Fi tourney, Staraptor wasn’t quite as dominant but it still did its fair share of work for the team.

Tyranitar (F) @ Chople Berry ***TurnToDust
Trait: Sand Stream
IVs: 31/31/31/19/23/10
EVs: 252 HP / 252 Atk / 4 SDef
Brave Nature (+Atk, -Spd)
– Rock Slide
– Crunch
– Low Kick
– Protect
Tyranitar (F) @ Choice Scarf ***Chartreuse
Trait: Sand Stream
IVs: 31/31/23/11/31/31
EVs: 4 HP / 244 Atk / 4 Def / 4 SDef / 252 Spd
Jolly Nature (+Spd, -SAtk)
– Rock Slide
– Crunch
– Earthquake
– Fire Punch
VGC 2010 Seattle Regionals Team Represent. TurnToDust, the Tyranitar, used to run Payback back in the day, but it was replaced with Crunch since Payback doesn’t hit for 100 power on switch outs anymore. It’s slower than IV 0 Politoed, which helped me win weather wars but is otherwise about as boring as you can get for Tyranitar movesets. I sort of felt that Tyranitar, as it was set up here, was the most “expendable” member of my team and felt that it would be the most likely member to be replaced from the team. However, it did pull its weight in the tourney, especially in my match against Styrofoameon and against Nightblade7000.
Of course, TurnToDust did end up being replaced with Chartreuse, though it was originally named TurnToDust as well in the hopes that it would trick Wolfey into misjudging its Speed because Chartreuse is, naturally, a Scarf Tyranitar, but the opportunity never arose. There isn’t anything particularly special about the Chartreuse. I had Earthquake instead of Low Kick because half my team is immune to Ground-type attacks, and being locked into Low Kick kind of sucks at times. It mostly used Rock Slide, getting anything from double misses to double flinches and reminding me why Rock Slide is a terrible move. The change to a Choice Scarf allowed Tyranitar to do a lot more for my team than in the previous team where it was often benched. Against Wolfey, Tyranitar served as a late-game sweeper after being harshly punished for trying to lead with it in my first battle with him. In the Wi-Fi tourney, Tyranitar was used on many occasions to quickly defeat weaker opponents, and was my only form of weather control. Facing off against rain teams often forced me to bring Tyranitar, for better or worse.

Conkeldurr (M) @ Leftovers ***DEEN
Trait: Guts
IVs: 30/31/20/10/30/31
EVs: 248 HP / 4 Atk / 8 Def / 248 SDef
Adamant Nature (+Atk, -SAtk)
– Mach Punch
– Ice Punch
– Drain Punch
– Protect

Scizor (M) @ Life Orb ***Alteisen
Trait: Technician
IVs: 31/31/26/xx/23/31
EVs: 28 HP / 252 Atk / 230 Spd
Adamant Nature (+Atk, -SAtk)
– Bullet Punch
– Bug Bite
– Superpower
– Protect
VGC 2011 Nationals Zoroark Team Represent. I made an overhaul to my Conkeldurr’s original EV spread, converting it into a Specially Defensive version, which I’ve seen a lot of Japanese players run in the past. Its ability to take a Gem-boosted Draco Meteor was quite comforting, and the recovery it received from Leftovers and Drain Punch provided a lot of extra staying power in battles. Ice Punch was used over Rock Slide, for better combating certain Flying-type Pokemon and Garchomp. Conkeldurr showed a solid performance whenever it was used in battle, but I often found that I was always wishing that my 3rd attacking move was something different. Sometimes Ice Punch was good, but other times I really wish I had Payback or Rock Slide.
Conkeldurr later became Scizor, the priority user. This is a pretty straight-forward Life Orb Scizor moveset. Not that it really matters too much, since Scizor never got to see any battles in the NB Finals, but the Scizor I used in the Major Finals had a different set of IVs: 31/31/24/xx/31/24. Ulitmately it just means that this one has a bit more Speed and a bit less Special Defense. The small amount of Speed allows Scizor to outrun Scarfed Hydreigons while under Tailwind. The EVs give 149 HP to optimize Life Orb recoil damage with enough Speed to outrun the usual bulky Cresselia and Rotom-W. Although Superpower saw a few uses here and there, I’m not really sold on it. I’ll probably be trying a different move in replacement next time.

Rotom-C @ Choice Scarf ***MoriSUMMER
Trait: Levitate
IVs: 31/18/31/30/26/27
EVs: 12 HP / 4 Def / 250 SAtk / 244 Spd
Modest Nature (+SAtk, -Atk)
– Thunderbolt
– Leaf Storm
– Hidden Power [Ground]
– Trick

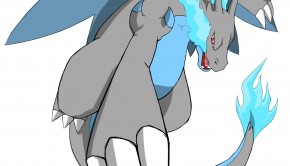
Latios (M) @ Dragon Gem ***Cybuster
Trait: Levitate
IVs: 23/24/24/30/27/31
EVs: 4 HP / 248 SAtk / 4 SDef / 252 Spd
Timid Nature (+Spd, -Atk)
– Draco Meteor
– Psyshock
– Helping Hand
– Protect
Rotom-C was not represented on a prior team. I guess there was one member that wasn’t on a team yet. It’s a spare Rotom that never found its way to any of my teams. It was originally supposed to be a Washer, but I didn’t have a Hidden Power Grass Rotom on hand. So I went with Rotom-C with Hidden Power Ground for Heatran. The team sort of lacks a fast Pokemon on the team, so having a scarfed Rotom was nice to have around. By the way, Hidden Power Ground saw no usage, even though it had to face a few Heatran. Unfortunately, it was always already locked into a move when Heatran came out. I believe that having it as a Rotom-W would have still been a better choice over Rotom-C, but I kept faith in Rotom-C.
At least until I replaced it with a fairly standard Latios for the last bit of the Major and the VGCS Winter Battle. Any sort of individuality for a Latios moveset will come from what you choose for Latios’ 4th moveslot after Draco Meteor, Psychic or Psyshock, and Protect. Since I don’t have an IV spread for a usable Hidden Power, I decided to go with Helping Hand. I didn’t use Helping Hand too much, but the primary application for it was to OHKO Cresselia with a Helping Hand boosted Bug Bite. Latios, in combination with Staraptor, helped me out a lot against Wolfey in the Nugget Bridge Major finals. Between those two Pokemon, I was able to play around being trapped thanks to the immediate pressure they put on just about any Pokemon. Although Gem Draco Meteor is a powerful move, I often found the Sp Atk Drop and 90% accuracy to be a bit of a hassle when dealing with lower ranked players in the tourney, as it could leave me open for some hax. Fortunately for me, Draco Meteor (almost) always hit when it counted.

Togekiss (F) @ Sitrus Berry ***Bad Apple!
Trait: Serene Grace
IVs: 31/13/31/31/18/31
EVs: 252 HP / 84 Def / 168 SDef / 4 Spd
Calm Nature (+SDef, -Atk)
– Air Slash
– Thunder Wave
– Protect
– Follow Me
Togekiss (F) @ Sitrus Berry ***Bad Apple!
Trait: Serene Grace
IVs: 31/13/31/31/18/31
EVs: 252 HP / 84 Def / 168 SDef / 4 Spd
Calm Nature (+SDef, -Atk)
– Air Slash
– Tailwind
– Protect
– Follow Me
Togekiss first appeared on my VGC 2012 Wi-Fi Spring International (and 2012 Pleasanton Regional Winning) Hail Team. I replaced Tailwind for Thunder Wave just to try it out since I am able to tutor Tailwind back to Togekiss in BW2. Although Togekiss isn’t too common, the moveset is fairly standard issue for a Follow Me supporter. The defensive support that Togekiss provides makes it one of the most critical members of the team — without her the team would probably cease functioning. I think I fielded Togekiss in nearly every match that I had in the Major.
For the Winter Battle and the Major finals I changed Thunder Wave back to Tailwind after realizing that the Pokemon I wanted to paralyze most were also the Pokemon that were immune to Thunder Wave. Setting up a Tailwind was relatively easy for Togekiss and allowed my team some space to shuffle around or go on the offense. By suppressing the opponent with Scarf/CB Rock Slides and Air Slashes, my team can often do a lot of damage while taking very little in return. With Shadow Tag Gothitelle, Wolfey had a decent check against my Togekiss, as it made me think twice about leading with something that lacks offensive presence. However, Togekiss was once again a vital part of my team for the Wi-Fi tournament, participating in many of my battles. Togekiss was probably the only thing that kept me from dying against Rain and active Trick Rooms. Oh, and I learned from the Wi-Fi tourney that my Togekiss never flinches the opponent when they use Trick Room, much to my disapproval.

Excadrill (F) @ Choice Band ***InfinitiaS
Trait: Mold Breaker
IVs: 31/31/28/00/22/31
EVs: 4 HP / 252 Atk / 252 Spd
Adamant Nature (+Atk, -SAtk)
– Earthquake
– Rock Slide
– X-Scissor
– Drill Run
Excadrill (F) @ Choice Band ***InfinitiaS
Trait: Mold Breaker
IVs: 31/31/28/00/22/31
EVs: 4 HP / 252 Atk / 252 Spd
Adamant Nature (+Atk, -SAtk)
– Earthquake
– Rock Slide
– X-Scissor
– Drill Run
The star of the team and the only unchanged Pokemon. People enter the team preview thinking that my team is going to be a sand team, big on getting Excadrill’s Earthquakes off and bring Pokemon like Rotom-W to serve as a check for Excadrill. Well, they’re half right. The team has a large focus on Excadrill using Earthquake, but…
Ability Activation:
*Excadrill breaks the Mold!*
Levitating Pokemon are not going to save you from Excadrill! Mold Breaker reduces, if not completely removes, the number of safe options my opponents have on their team to take Excadrill’s attacks. “Safe” options of Bronzong or Rotom-A become almost dead weight on the team, and I also don’t have to worry about wacky things like Levitating Heatran. CB Earthquakes are devastating. 252 HP Metagross and Tyranitar have about a 50% and 62% chance chance at being KO’d by an Earthquake, respectively. And have an even higher chance at being downed by a Drill Run. While powerful, Excadrill does have to be careful. 140 Speed is not the fastest Pokemon out there. Since it runs a Choice Band, it is quite vulnerable without some support, especially against spread moves such as Muddy Water, Heat Wave and Earthquake.
For the Major finals, I knew that Wolfey could counter-team my Excadrill, but I wanted to bring it to the final battle anyways. The updated team is a lot less reliant on Excadrill’s sheer offensive strength, but Excadrill would still show up from time to time when I thought it could do some serious damage. Wolfey’s team answered Excadrill soundly, unfortunately, so it had to sit on the sidelines. In the Wi-Fi tourney, I often ran into opposition with Garchomp or Volcarona, which I wasn’t too keen on fighting, so the star of my previous team had to sit out a lot of the time. I never used X-Scissor once the entire Wi-Fi tourney.
Team Overview
As you might expect, the general idea of the team was to try to get Excadrill to do as much damage to the opponent as possible. Misleading people into thinking that this was just a run of the mill Sand team definitely contributed to the team’s functionality, although it’s not absolutely necessary for me to claim victory. The my win condition would frequently be to take out the opponent Flying-types, then wipe them out with Excadrill’s Earthquakes while Togekiss covers with Follow Me.
I’ve been told that the team is a bit lacking in Speed control and has pretty poor defensive synergy, and… that’s probably right. A lot of the time, the team has to rely on good reads of the opponent and a lot of switching around to stay in the game. Although there will be times where I can just flatten the opponent with Excadrill’s Earthquakes, I don’t always get such freebies. Overall, the team had some glaring flaws to it. I felt that my ability to handle Rain teams was shaky at best and was quite afraid of facing scarfed Therian Formes and Technician Breloom. Oh, and looking back, I can probably add Lum Berry Quiver Dance Volcarona, and Mamoswine to that list as well. Going into the Nugget Bridge Major, I felt that the competition would be pretty tough, so I tried to keep a realistic outlook. The team I was running packed a really big surprise factor to it, and ultimately I felt that regardless of my opponent, there wasn’t really such a thing as a “free win” here.
The updated team followed a similar pattern but ended up playing differently as the team member changes opened up my options quite a bit. Despite having two Steel-types, the team’s defenses still aren’t spectacular — partially due to having two Normal/Flying birds on the team. The team has a lot more attack avenues, however, thanks to a general rise in Speed compared to my previous team, leading to a bit less reliance on Excadrill to get the job done.
Having decent prediction skill and an aggressive style of battling is crucial for this team to do its job. Since a lot of the team’s defense is from laying down strong offensive pressure or through Togekiss, you can’t afford to be wasting turns running into opponent Protects. Likewise, a bad lead match up can spell disaster. There are times when being bold and taking risks will be what gets you through the day. The team has a few tricks up its sleeve, so you need to take full advantage of them. This is a team that likes to live on the edge. I feel that it has an answer somewhere for a lot of the teams that I ran into, but sometimes it will require some intel on the enemy team before coming up with a good way to counter it.
Nugget Bridge Major Report
Round 1: vs. Starslasher
The bracket goes up, and my first opponent is Starslasher. Since I didn’t hold any seeding points going into the Major, there was a very realistic chance that I could be paired up with a big name player right off the bat. While I faced a person I knew little about, that also meant that I needed to be on my guard, since they could use almost anything.
Opponent Team Preview:


From 3 Ground immune to zero. Excadrill has a field day as long as my opponent doesn’t bring Virizion. I sort of worried about Virizon showing up, but it never did.
We had a bit of trouble getting the match going due to some disconnection problems that kept happening early in the match. Eventually we managed to get the match going after taking a 30 minute break and agreeing to allow changing our chosen Pokemon. This was strictly to my disadvantage, since my opponent now knows about the surprise factor in my team, but I agreed to it anyways and we finally get our first match underway.
Due to a bit of over prediction in lead choice and my first turn, I am dropped to an early 3-4 deficit as Excadrill takes a Helping Handed Flamethrower from Starslasher’s Hydreigon to the face and is KO’d. I spend the rest of the match clawing my way back. It ends up being the opponent’s Garchomp and Rotom-W, with a crippled Hydreigon in the back, against my Salamence and Conkeldurr, and the opponent decided to Protect with Garchomp, allowing me to get back into the battle. I manage a consecutive Protect with Salamence which wins me the battle.
Game 2
The second match I led with Togekiss and Excadrill, and my opponent didn’t really have any answer for it because they didn’t bring Garchomp this time and I managed to stop his Cresselia from acting with Air Slash. The battle ended up with Togekiss and Excadrill against his Hydregion, at which point it was pretty much over.
Round 2: vs. TrollFreak
My R2 opponent was TrollFreak. While few predicted TrollFreak to reach R2 and nobody predicted him to beat me, I knew that he’s not someone to be taken lightly. It didn’t help my confidence much when a whole bunch of big names were eliminated just prior to my scheduled match.
Opponent Team Preview:


A team with a few uncommon Pokemon in Bisharp and Mamoswine. His team has a large Ground weakness, but Salamence and Mamoswine can keep my Excadrill in check.
Game 1
I don’t remember too much about this match. All I know is that I get a lucky Icicle Crash dodge and am able take this battle in the end by wiping out TrollFreak’s last two Pokemon, a Rotom-W and Heatran, with an Earthquake.
Game 2
I get another lucky Icicle Crash dodge, and a number of lucky full paralyses against his Cresselia. However, I make a play to take out his Cresselia by sacrificing my Excadrill, leaving me with a Salamence and Conkeldurr against Trollfreak’s Salamence and Rotom-W. TrollFreak outplays me in the final acts of the battle, double targetting my Conkeldurr as my Salamence uses Protect, taking this battle and bringing series to Game 3.
This match was extremely close. The battle opens with me double targeting and taking out TrollFreak’s Mamoswine, but Cresselia lands a Critical Hit, taking out my Conkeldurr. TrollFreak sends out Salamence while I send out Togekiss. I’ve seen Helping Hand from Cresselia and am extremely scared of a potential HH Gem Draco Meteor to take out my Togekiss. But it also has Heat Wave, which means that I don’t have much of a proper switching option for my -2 Rotom-C.
After some thought, I went for a Thunder Wave on Salamence and switched out Rotom-C for Excadrill. TrollFreak goes for the Helping Hand HH Heat Wave, but somehow Excadrill barely survives it. I proceed to go for the Rock Slide to try to play for paraflinch on Salamence while Togekiss covers with Follow Me. Salamence doesn’t flinch, doesn’t get paralyzed, and mocks me by missing Togekiss but not Excadrill.
I send out my Rotom-C. Rotom-C Tricks its Choice Scarf onto Cresselia, locking it into Psychic, while Togekiss finishes off Salamence. From here, I was just hoping that TrollFreak’s last Pokemon would be something I could defeat. It was Rotom-W, the best case scenario for me. In the end, I manage to connect with Leaf Storm to take out the Rotom-W, then proceed to slowly chip away at the Cresselia until its eventual defeat. Rotom-C ends up saving me in the end of this battle. And to think I was about to replace it prior to my match with TrollFreak…
Round 3: vs. Styrofoameon
I manage to narrowly dodge a bullet in Round 2, aka the Round of Upsets. Moving on, my next opponent was Styrofoameon.
Opponent Team Preview:


I don’t really like the Rain matchup, but I try to wing it. I note that Cresselia and Metagross may try to pull a TR Swagger combo, and I need to keep an eye out for the Blissey. Aside from that, I would need to start battling to really get any more information about Styrofoameon’s team.
Game 1
I bring Togekiss and Excadrill as leads with Tyranitar and Rotom-C in the back to change the weather and take care of Blissey respectively. I get a good lead match up against his Cresselia and Metagross leads. Expecting Trick Room, I go for the Air Slash and Earthquake, but I fail to stop Cresselia from moving. Fearing a potential Swagger boost, I cover myself by using Follow Me on Turn 2. Excadrill KOs Metagross and leaves Cresselia in the red, but not before dropping to about 30% by Metagross’s own Earthquake. Zapdos is sent in, so I switch out Excadrill for Tyranitar while Togekiss protects. Tyranitar then proceeds to uses Styrofoameon’s own Trick Room against him, turning the tide of the battle. In the end, only Blissey remains, and it is tricked a Choice Scarf, locking it into a non-damaging move, from which he then forfeited.
Styrofoameon did not bring any of his Rain Pokemon in the first match, but I was certain that he would this time. I lead with Tyranitar and Excadrill for the second battle, since Tyranitar would win the weather war if he leads Politoed. Instead he leads Zapdos and Cresselia. I decide that the Zapdos probably isn’t too threatening, and double up on Cresselia, but he decides to switch out both of his Pokemon for Politoed and Ludicolo. Unforunately for Ludicolo, it switched in for Cresselia and was demolished by a Drill Run and Crunch. Zapdos is sent back out, but it Volt Switches out for Cresselia, dealing higher damage than I expected and telling me that it has Choice Specs.
Politoed mispredicts a switch-out from Excadrill, shooting an Ice Beam at it for 40%, while Tyranitar finishes it off. Zapdos returns and now has to commit to an attack. I have Tyranitar protect to scout Zapdos while Excadrill Drill Runs Cresselia for just under half. Zapdos locks into Thunder. From there it was just a matter of taking out Cresselia and having Excadrill alive and locked into either X-Scissor or Rock Slide. Which I performed easily by sacrificing my Salamence to reset Excadrill and finishing off Cresselia with X-Scissor.
Round 4: vs. Nachocheese999
Since Huy was defeated, my next opponent was Nachocheese999. While I have no doubts that Nachocheese is a strong player, I really didn’t want to be losing here. I would probably hear no end to the fact that I lost to the 2012 “Canadian” Seniors champion if I did.
Opponent Team Preview:


Although I have only seen bits and pieces of it, the team he used here looks like his World’s team. Honestly, I don’t quite remember what was on it aside from Amoonguss and Cress because of that one time he Spored himself.
Game 1
His team has a large weakness to Excadrill as long as I can find a way to handle Gyarados. I decide to go with my Togekiss/Excadrill lead, with Salamence and Rotom-C in back. After choosing, I then expected him to lead with Gyarados and Cresselia, which wouldn’t be the best matchup for me.
And indeed, he leads with Gyarados and Cresselia, which means that I had to try to play around him. I try to play for some flinch with Rock Slide and cover my Excadrill with Follow Me, taking a Gem Waterfall for 2/3 and activating Sitrus. My fishing for hax falls short and Trick Room goes up. I switch out Excadrill for Rotom-C predicting an attack on Excadrill, but instead Nachocheese doubles up on my Togekiss, leaving it at about 2 HP. I land an Air Slash on Gyarados, and make note that my Togekiss is faster than his Cresselia under the Trick Room. I manage to take out Gyarados on the following turn, meaning that I just had to last the duration of the Trick Room to win this.
With two Turns of Trick Room to go, Nachocheese sends out his Heatran. I’m in some serious trouble here, as Rotom cannot Protect, Togekiss has already used Protect, and losing both my Pokemon here would leave Excadrill as a easy target on the final Turn of Trick Room. I go for the second Protect with Togekiss, but it fails and both my Pokemon are taken down. I send out my CB Excadrill and Salamence, thinking that the match is over. I pretty much concede to my fate and go for the only option I have, EQ + Protect and hope Heat Wave will miss. To my surprise, Nachocheese uses Substitute with Heatran, allowing my team to get back into the game, as Excadrill demolishes the sub and slams into Cresselia. Trick Room goes down, and I easily clean up.
Since Gyarados was the main danger to my team, I decided to lead Rotom-C alongside Excadrill this time to cover the remainder of Nachocheese’s team. I end up playing extremely sharply in this battle and remained a step ahead at all times, whether I planned to or not.
Nachocheese leads with Metagross and Cresselia this time. I expect that he’ll Trick Room, so I switch out Rotom-C, so I won’t be stuck with two Choice users. I then switch out Excadrill back for Rotom-C, predicting a switch out to Gyarados. I essentially spend the entire duration of the Trick Room going on the offense, even though my Pokemon were the faster, and thus slower, ones. In the end, Trick Room goes down on the turn that Cresselia falls, and I have an easy time taking the match.
Round 5: vs. Nightblade7000
After seeing the D/C fest that went down between Nightblade7000 and Crow. I had a bit of time to think about whether I could deal with the team that Nightblade used. It wasn’t the best of matchups for me, but I managed to come up with a game plan should he use the same team as against Crow. If he changed his team, then I would have to wait and see.
Opponent Team Preview:


He changed his team slightly from his match with Crow. I am very worried about fighting Volcarona, but he doesn’t know that my Excadrill has Mold Breaker so there was a chance he wouldn’t try it. There were some assumptions I could make about his team, but I would really need to see a move or two from some of his Pokemon to confirm my suspicions.
The battle’s stream, with all 3 battles can be found here
Be warned, though, there is a lot of “thinking” time between turns, either by me or by Ben, causing the 3 games to take nearly 2 hours to finish.
I will give a bit of my thinking process for each turn here. So you can try to better understand what I was trying to think of whenever I take a long time to play a turn. Throughout the match, I felt that I could read Ben’s moves wellbut just didn’t have enough confidence in my intuition to follow through at times.
Game 1
With the thinking time between rounds, and since his team was similar to the one he used against Crow, I had already decided that Togekiss + Salamence would probably be the most reliable lead that I had against him. I then spend some time to think of my back half. I ended up going with Excadrill and Conkeldurr. Excadrill could do a lot to his team, as long as his Excadrill doesn’t have Sand support and Volcarona doesn’t show up. Conkeldurr rounded my team out, as it hit hard against a large number of his Pokemon between Drain Punch and Ice Punch.
Turn 1
He leads with Thundurus and Hitmontop. I’m pretty sure that it’s a Bulky Thundurus, but I’m a bit worried that will have an Electric Gem like in his battle with Crow. I decide to go for Follow Me to redirect Fake Out and use Draco Meteor anyways.
Turn 2
That last turn went poorly, with Hitmontop outrunning Togekiss, and Salamence being gripped by paralysis. It takes a bit of thinking of what to do next. I still don’t know anything about Thundurus’ item or if it’s an offensive moveset. I think he’ll try to go after Togekiss to take it out, but he may also throw a Close Combat, making a switch to Excadrill to take Thunderbolt unwise. I end up going for the Draco Meteor on Thundurus again to try to confirm its bulkiness while Togekiss uses Protect.
Turn 3
That turn went much better and provides me with some information about his Thundurus. I’m still not in the best shape though. I remember Cybertron’s comment about Thundurus still surviving a -2 Draco Meteor after eating a Sitrus Berry, so I expect Thundurus to survive the next hit. I don’t want Togekiss taking a Thunderbolt, but I can’t switch to Excadrill for fear of Close Combat, so I switch out to Conkeldurr, who should be able to take any attacks relatively easily.
Turn 4
The previous turn has shifted things towards my favour as Hitmontop switched for Excadrill and Conkeldurr was paralyzed on the switch. I expect a switch from Excadrill, fearing a Mach Punch, so I throw a Drain Punch at it instead to heal back some HP, and fling a Draco Meteor at Thundurus for some extra damage, since my previous one missed.
Turn 5
I feel that I need to keep up the offensive pressure, so I Mach Punch to pick off Thundurus and drop a -4 Draco Meteor on Latios
Turn 6
Since Conkeldurr is near full HP, I’m pretty sure it can take a Gem Draco Meteor, so I, once again, continue on the offense.
Turn 7
I don’t think I needed the Meteor to miss last turn, but I’ll take it. I decide to double Switch here as I expect a Fake Out and Draco Meteor.
Turn 8
Draco Meteor misses again, but that one doesn’t really matter as Togekiss could survive it easily. Togekiss and Excadrill are in position for Follow Me + Earthquake sweep to win the battle and do so.
Game 2
I sort of know that he’ll bring Volcarona this time. I sort of wish that I didn’t reveal that my Excadrill had Mold Breaker, but it was more important that I was able to secure the first battle. Since I could Thunder Wave Volcarona if he brings it, I decide to lead with the same leads. I also make the unfortunate decision to not change my back end. I had a bad feeling about doing so, but did it anyways and decided to improvise as things went along. Otherwise I would have brought Tyranitar instead of Excadrill. The decision not to field Tyranitar probably cost me big.
Turn 1
As expected, Ben leads with a VolcTop combination. Togekiss being unable to redirect Fake Outs hurts me here, but I decide to go for a Draco Meteor and Thunder Wave on Volcarona and see how things play out.
Turn 2
That Lum Berry puts me in a tricky situation. I go for the Thunder Wave on Volcarona again while Salamence uses Draco Meteor on Hitmontop. I choose my moves a bit quickly [Really? -Ed.] and quickly realize that this will turn out badly for me. There was a Disconnection as Ben decides on his next move, but since only one turn had passed it was easy to recreate the battle back to the current state. While I had an opportunity to change my move, I felt it wouldn’t be right to change a move that I had already committed to before the disconnection occurred.
Turn 3
Ben does what I feared that he would do. From this point I pretty sure that I’ve already lost this battle, as he sacrificed his Latios and brought back Hitmontop to get another Fake Out and Quiver Dance in. While I worried about Hitmontop having Feint, I eventually convince myself that it will use Fake Out, and I switch out Salamence for Excadrill.
Turn 4
I’m in a desparate situation. My hope is that I can bait him into attacking Excadrill so Togekiss can use Thunder Wave on his +2 Volcarona.
Turn 5
He doesn’t fall for it. I’ve pretty much lost and just choose my moves.
Turn 6
I don’t want to show what my last Pokemon is, so I just forfeit the match here. It was possible that Heat Wave could miss, which may have been what Ben was worried about for this turn, but I just wanted to move onto the next match.
Game 3
Volcarona destroyed me, so naturally he’ll go with Volcarona again. I decide to bring Tyranitar and Salamence for leads this time. Even if he brings Hitmontop to support Volcarona, both my leads will be able to threaten and stop a Quiver Dance set up. Togekiss and Conkeldurr make up the the back.
Turn 1
I’m kind of worried about a potential Protect + Close Combat, even if Tyranitar can tank it due to Intimidate and holding a Chople Berry. Due to this fear I end up covering Hitmontop with a Draco Meteor while I use Rock Slide with Tyranitar.
Turn 2
That was a pretty smart play by Ben to avoid damage to Volcarona, but it does give me some breathing room for myself. A Helping Hand Rock Slide is dangerous for my Salamence, and I don’t want to take a potential Drill Run or Earthquake either, so I double Switch: Togekiss replacing Tyranitar, and Conkeldurr for Salamence.
Turn 3
I’m in a nice position now with Excadrill trying to Protect on the previous turn. I expect Excadrill to switch out on this turn, and I double up on Excadrill.
Turn 4
My prediction pays off, as Ben switches in Volcarona to take the attacks towards Excadrill. Flame Body activates, which is very double-edged for my Conkeldurr because it is hard to tell whether its survivability or added offense will benefit me more. Conkeldurr should be able to take a Heat Wave and a Close Combat at full health, so I decided to switch out Togekiss, to preserve it for later, sending out Salamence for further Intimidation, while Conkeldurr goes for Drain Punches on Hitmontop.
Turn 5
Volcarona survived the sandstorm damage, and now I have to deal with the Latios that switched in. I expect Volcarona to go for a suicide attack, while Latios will go for the KO on one of my Pokemon. I have no clue who Latios will try to target. I initially think of going for the offense, Mach Punching the Volcarona and attacking with Salamence, but losing Conkeldurr would put me in a tough spot against Excadrill. It takes me a while but I eventually decide to play it safe, protecting with Salamence, and switching Conkeldurr for Tyranitar.
Turn 6
Excadrill is sent out to replace Volcarona, and I’m in another tight spot. I decide to switch Mence for Togekiss, and Protect with Tyranitar. as I don’t know any information about his Excadrill’s moveset or item.
Turn 7
I switch back to Conkeldurr after Togekiss takes the Draco Meteor. The nerves start to get to me here. There are a lot of different moves that can be done for both of us. I take some time to do a few damage calcs, since this turn may be very important for the match outcome. Eventually, I decide to go with a Mach Punch and Crunch. I was sort of confident that Conkeldurr could take an attack from Latios, but it would die if it took an attack from both both Excadrill and Latios. I can’t risk that. I lose Conkeldurr while Ben loses Latios.
Turn 8
2 vs 2. Salamence and Tyranitar vs Hitmontop and Excadrill. Everyone is at -1 Atk, though Salamence isn’t affected. Once again, since I don’t know Hitmontop’s 4th move, nor Excadrill’s item, making a decision is really tough. Feint scares me. Life Orb scares me. I once again take some time to do some damage calculations and find that a Helping Hand Rock Slide will not KO Salamence unless it has a Life Orb. Tyranitar is somewhat dead weight, though it can survive a -1 attack from either of Nightblade’s Pokemon. I manage to convince myself that he will use Fake Out on Salamence, so I Protect with it and Low Kick against Hitmontop. It will probably take two Low Kicks to take down either of his Pokemon, but Fire Blast can OHKO Excadrill, so I went with the decision to try to finish off Hitmontop. I think I ended up taking an extremely long time for this turn, but Ben took a bit longer.
Turn 9
The net outcome of the previous turn was about the best I could have hoped for. From here the decisions are pretty easy. Not much to do but go on the offensive. I go for the Fire Blast and Low Kick. Tyranitar dodges again, but Salamence Flinches. Hitmontop Close Combats Salamence to try to finish it off, but it survives with just a small amount left. Tyranitar finishes off Hitmontop with Low Kick.
End Game
I’m pretty screwed. Excadrill Protects as Salamence is finished off by the Sand. The match is now down to 1 vs 1. Tyranitar vs Excadrill. Nothing left for me to do except go for a Critical Hit with Low Kick. I was typing a comment related to that before choosing my move, but decided not to post it. Excadrill uses Drill Run, boosted by a Ground Gem but falls barely short of taking out Tyranitar. Low Kick goes off. and I see the HP bar fall further than expected…”A critical hit! The foe’s Excadrill fainted!”
The final battle with Ben, nearly decided by a late game flinch, had the match’s outcome reversed in the blink of an eye. I was in shock with the surprise outcome of the match, but it meant that I would live to see the next round of the NB Major.
Semifinals: vs. Rukario
Since my battle with Nightblade7000 was streamed, I decided to switch up my team a bit. I went with an experimental hail version of my team, that is probably even more offensively oriented than ever, with so many common weaknesses that it’s a wonder the team even stands up. Rukario used the same team that he used against kingofkongs, but since he demolished kok pretty badly, I don’t know too much about it aside from Life Orb Scizor and the team having a bit of a Mold Breaker Excadrill weakness.
My Team Preview:


vs
Opponent Team Preview:
I was a bit worried about the Cresselia’s potential for Trick Room, since my only good ways of dealing with Steel-types are both holding Choice items. But I could be a bit assured that Togekiss, my only real form of defense, would not have to see Thundurus, due to the many ways I have of defeating it, and heavy Electric-resistance on the team.
Game 1
Rukario leads off with Scizor and Cresselia against my Excadrill and Togekiss — a rather favourable matchup for me. I go immdeiately for the Earthquake and an Air Slash on Cresselia, hoping that I could intercept the potential Trick Room. Once again, Air Slash fails to deliver the flinch and Trick Room activates.
Since I haven’t taken any attacks yet, Togekiss can easily act as a shield for Excadrill, and I go for the Follow Me + Earthquake. Togekiss takes a Bullet Punch and Ice Beam and ends the turn at about 60% HP after eating a Sitrus Berry while Cresselia and Scizor are put into the red.
I Protect with Togekiss and throw out another Earthquake, as Excadrill should be able to handle any attacks that are sent at it this turn. Scizor and Cress are both taken out with two more turns of Trick Room remaining.
Heatran and Tyranitar are sent out. Heatran floats on an Air Balloon, which I forgot about, and makes it suddenly a much larger threat to me since I know its a SubTran. I switch out Excadrill for Garchomp and throw an Air Slash, but Tyranitar flinches with Rock Slide and it is finished off by Heat Wave. I do note that my Togekiss moved before Heatran under Trick Room.
There is one turn left of Trick Room as I send out Abomasnow. I go for an Ice Shard to break the Balloon, and Rock Slide. After choosing, I kind of feel like it was a bit of a shakey play, with Heatran potentially using Substitute. But it works out for me as Heatran goes on the offensive. Garchomp is taken out, and then Excadrill cleans up.
Game 2
That Heatran has an Air Balloon, which makes me have to think twice about leading off with Excadrill like Game 1. I take a bit of time to think about it, then decide to go with Garchomp and Togekiss to lead game 2 and see how it plays out. Rukario leads with Heatran and Latios. The Air Balloon prevents me from going for an Earthquake, but he also doesn’t know that my Garchomp is Scarfed, allowing me to get the jump on Latios with Dragon Claw making it an early 4-3 match while Togekiss breaks Heatran’s Air Balloon, but not before it gets to put up a Substitute. Cresselia arrives, and for the fourth, and last time of the tourney, I fail to flinch a Cresselia as it sets up Trick Room.
With Trick Room up again I have to tread carefully: I want Heatran to lose its Sub by the time Trick Room ends so Excadrill can sweep, but my current options aren’t very favourable. I spend some time to plan a few turns ahead, then execute my strategy. I start off by using Follow Me to cover Garchomp from Cresselia’s Ice Beam and Dragon Claw Heatran. I was hoping to leave the Sub at a sliver of HP and then break it closer to the end of the Trick Room period, but Dragon Claw broke it right away.
I proceed to go for Air Slash to try to suppress Heatran while I switch out Garchomp for Abomasnow, but to my surprise, Heatran is swapped for Tyranitar. From here on, it was a matter of getting Rukario’s Pokemon down to range of being KO’d by Excadrill and then getting Excadrill onto the field. After I managed that, Excadrill once again swept. Apparantly, Rukario overlooked the fact that the Air Balloon will still pop even if you hit a Substitute, which was the reason for the strange switch out that he did. Excadrill scored 9 KOs between the two battles (two were my own Abomasnow). What a boss.
Final Match: vs. Wolfey
My final match was with World’s runner-up, Wolfey. I know that he has a lot of teams that he can use, and that he has a lot of wacky team strategies. While I feel confident against a potential “gimmicky” team match up, I had to be ready for anything and be sure that I play a team that I’m comfortable with.
I decided to go with the variation of the Mold Breaker Excadrill team that would later become my Winter Battle team. While I know that Wolfey will have a counter to Excadrill, I’m not going to abandon my pal in the final match, even if Excadrill is just a bench warmer. Besides, overpeparation for one Pokemon isn’t always the best idea, so there was a chance that it could still show up.
My Team Preview:
Wolfey’s Team Preview:


Certainly a strange team from Wolfey. I can immediately expect that the Durant has Truant and the Gothitelle has Shadow Tag, trying to pull off an Entrainment Truant-Trapping strategy. I kind of feel like Volcarona and Hitmontop there due to how much trouble I had with them when facing Nightblade7000.
Game 1
I feel that Staraptor is a strong candidate against Wolfey’s team. Final Gambit can be used to KO Gothitelle and escape, and Brave Bird hits hard against all his Pokemon. I decide to partner it with my Scarfed Tyranitar. He leads with Durant and Gothitelle, and I immediately kind of regret my decision. I go for the Fire Punch, which Durant survives with a Sash and Entrains my Tyranitar to be a lazy bum. I Final Gambit to take out Gothitelle as Landorus-T switches in for Durant.
I then bring in Togekiss, while Wolfey brings in Volcarona. Since my Tyranitar, Truant, at -1 Atk, and locked into Fire Punch, isn’t doing me any favours, I switch it out to my Latios, despite the risk of a potential Bug Buzz, while my Togekiss uses Tailwind. I’m hit with Rock Slide, don’t flinch, and Volcarona gets a Quiver Dance up.
I feel that Latios is a bit expendible, so I’m not too worried about it getting taken down, as it allows my Tyranitar to come back in and threaten with Rock Slides. I go on the offensive, using Psyshock on Volcarona who protects, and covering Landorus-T with Air Slash who swaps for Durant.
Or… perhaps I wasn’t as confident with losing Latios as I though. Next Turn, I go for the Draco Meteor on Landorus-T and use Follow Me. Wolfey sees through this and goes for the Heat Wave.
I was hoping to try to have him take out Latios so I could bring Tyranitar in, but he played smartly and played around my Latios, going for a second Quiver Dance. In the final turns of the game, he once again reads my moves, KOing my Tyranitar on the switch in, then finishing off my remaining two Pokemon with Heat Wave.
Game 2
Staraptor has confirmed to me that it has what it takes, but leading with Tyranitar was definitely not the right idea. I switch things around and lead with Staraptor and Latios, with Togekiss and Tyranitar in the back. This way if Durant leads I have the option to Protect with both of my Pokemon to stop Entrainment.
Wolfey leads with Hitmontop and Durant this time. I immediately expect that Hitmontop will have Feint, and decide to just throw attacks towards Durant to weaken it. I could KO Hitmontop, but I don’t want to give Wolfey an opportunity to replace a Pokemon with Gothitelle, especially with Durant hitting me with Entrainment. My suspicions are confirmed as Latios is hit with Feint, but instead of using Entrainment, Wolfey goes for an X-Scissor for about 60% of Latios’ HP. With Durant being Truant for the next turn, I have an opportunity to go on the offense. I don’t really like Hitmontop, so I piled up a Brave Bird and Psyshock at its direction. Psyshock KOs, and the Brave Bird hits the incoming Gothitelle.
Durant is switched in, but then switches back out to Volcarona, who takes about 75% from a Gem Draco Meteor, while Staraptor takes out Gothitelle with Final Gambit. I then send in Scarf TTar and clean up, tying the series 1-1.
Game 3
I decide to go with the same leads, but also make a last minute decision and field Scizor in place of Togekiss. Wolfey leads with Gothitelle and Durant again. But since I have 2 Pokemon with Protect, I am able to stop Durant’s plan. Next Turn, I go for a Psyshock and Brave Bird against Durant, which leaves it at an inch of its health. The following turn, Wolfey pulls a double switch, but both his incoming Samurott and Volcarona are taken out by a Critical Hit Psyshock and Brave Bird, respectively. The match was pretty much sealed at this point.
With this, I had won over Wolfey to take the 1st Nugget Bridge Major tournament. Looking back a bit at my final match, despite how easily I was able to dismantle his strategy in the end, it scares me a bit to realize just how badly the team he used would counter the teams that I had shown, fielding attacking Pokemon that are hard for me to deal with while cutting off the switching options that I rely so heavily upon. To come up with such a counter, while keeping the team looking as wacky as ever, I really have to hand it to Wolfey. He took full advantage of being able to change his teams between rounds and shows why he’s a trainer to watch out for.
Notable Winter Battle Events
The next major event I took this team to was the 2012 VGCS Winter Battle where I ended up placing 2nd in the North America region, only behind Biosci. I played way too many battles to cover in any kind of depth for this section, so here are just some highlights from my tournament experience:
- Battling against Biosci. It may be better if you see the match for yourself. The match had so much one-sided luck, yet managed to be a close match. The battle is a bit more special knowing that Biosci ranked 1st.
- Facing off against a W, X, and then Y all on the same day [And before the Pokemon X and Y announcement, even! – Ed.]. In that order. Too bad I did not get to meet with a player named Z. There was a N and R that showed up after Y, however.
- The number of times that I was intentionally disconnected on was at an all-time low for this tournament. With only about 30% of the D/Cs feeling like they were blatantly intentional, instead of a number closer to 60%. However, the number of issues with D/Cs occuring upon seeing a Trainer’s Greeting, and at Team Preview was way up from before.
It may be better to just list off a few random statistics here instead:
Notable opponents faced: NightBlade7000, Fishy, Biosci, Huy, Stephen Morioka, Fatum, mattj, Matty, Picollo, Red Striker, EnFuego, N8DAGR8
Record Against Said Players: 10W-2L
Lowest rated loss: Xador, from Panama, 1511
Highest rated win: Matty, from Marche, Italy, 1879
Longest Win Streak: 26 Wins
Longest Losing Streak: 2 Losses
Win rate: 87.59%
Average Rating of opponents: 1549.46
Final Record: 127W – 18L
Final Rating: 1927
Rank: 2nd Place
Closing Remarks
And now, my report has come to a close. Thank you for reading, and I apologize for taking so long on turns against Ben, or taking turns too quickly against Wolfey. Thanks to my opponents, for the great games of Pokemon played, and thanks to Nugget Bridge staff for hosting this Tournament. Congrats to Wolfey and Nickscor for winning the Prediction challenge for the Nugget Bridge Majors. Perhaps we’ll meet again in the Nugget Bridge Invitationals. Though I’m sure it will be sooner than that.
I’m proud of my second place finish in the 2012 VGCS Winter Battle and am looking forward to following that placement up in live competition at Regionals and Nationals. Thanks to everyone for playing and making both tournaments covered competitive and enjoyable.
About the Author
R Inanimate R Inanimate is a long time participant in official Pokemon Tournaments, first attending the 2005 Battle in Seattle Tournament. Known for using teams that are a bit off from the standard, and not using RNG'd Pokemon. Avid Battle Frontier fan. Worlds 2013 competitor, known for running Togekiss and Mold Breaker Excadrill.
Related Posts
Memoirs of a World Champion: by 2015 World Champion SHADEviera →
The Other Fire Doge: A Top 8 Lancaster Report →
Blazing Forward! A Malaysian Regionals 2nd Place Report →